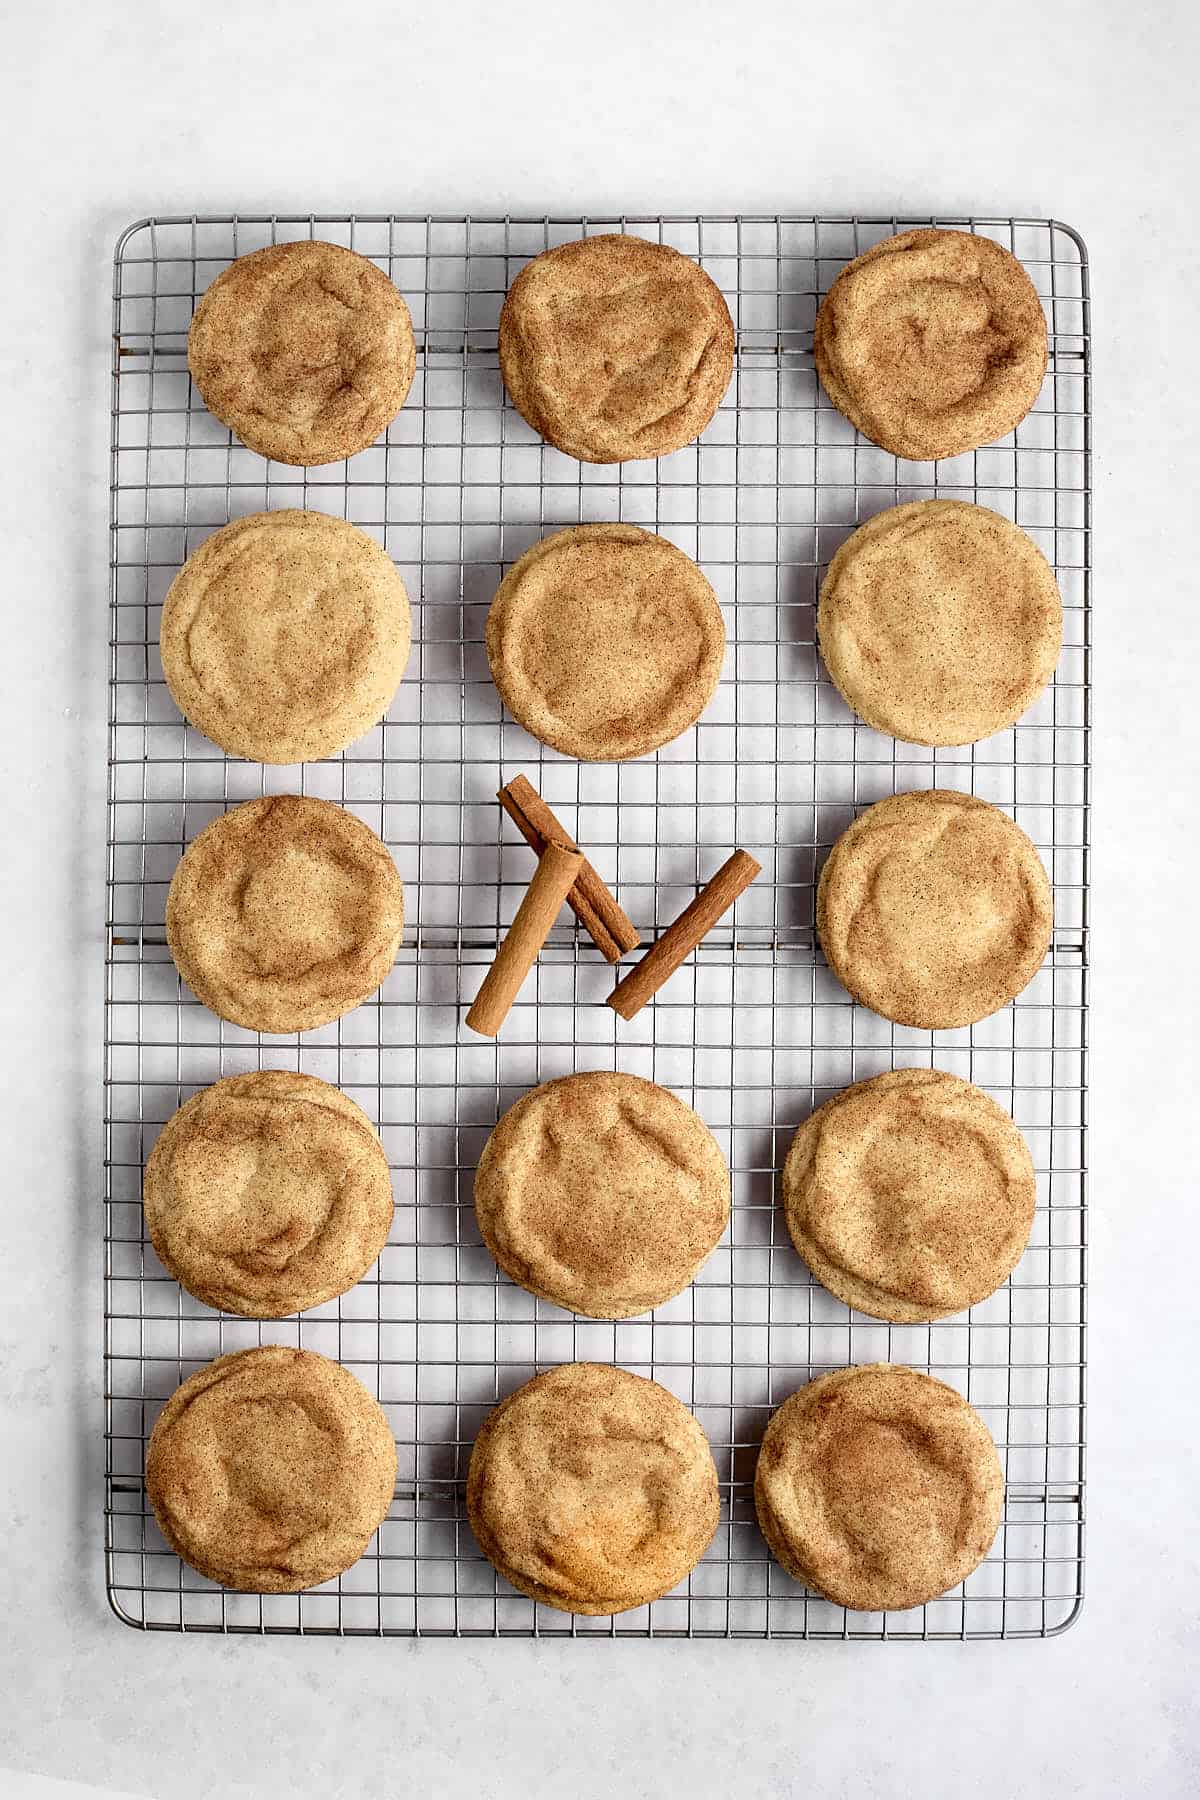
Do you want to make the BEST thick and fluffy snickerdoodle recipe? Then grab these secret tips to transform ordinary snickerdoodles from good to absolutely AMAZING! No chill time required.
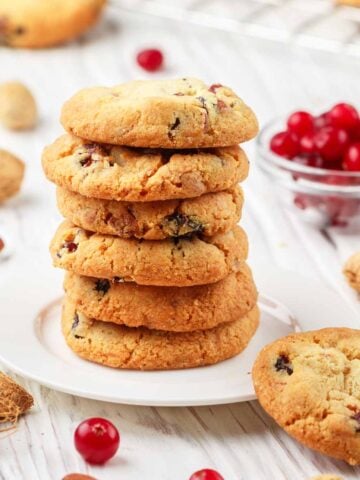
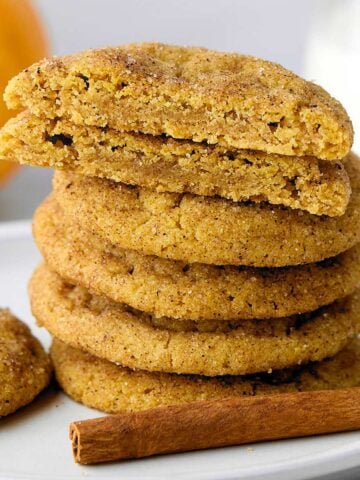
Thick, fluffy, and slightly tangy with a crinkly top, the cookies taste of cinnamon and sugar sweetness.
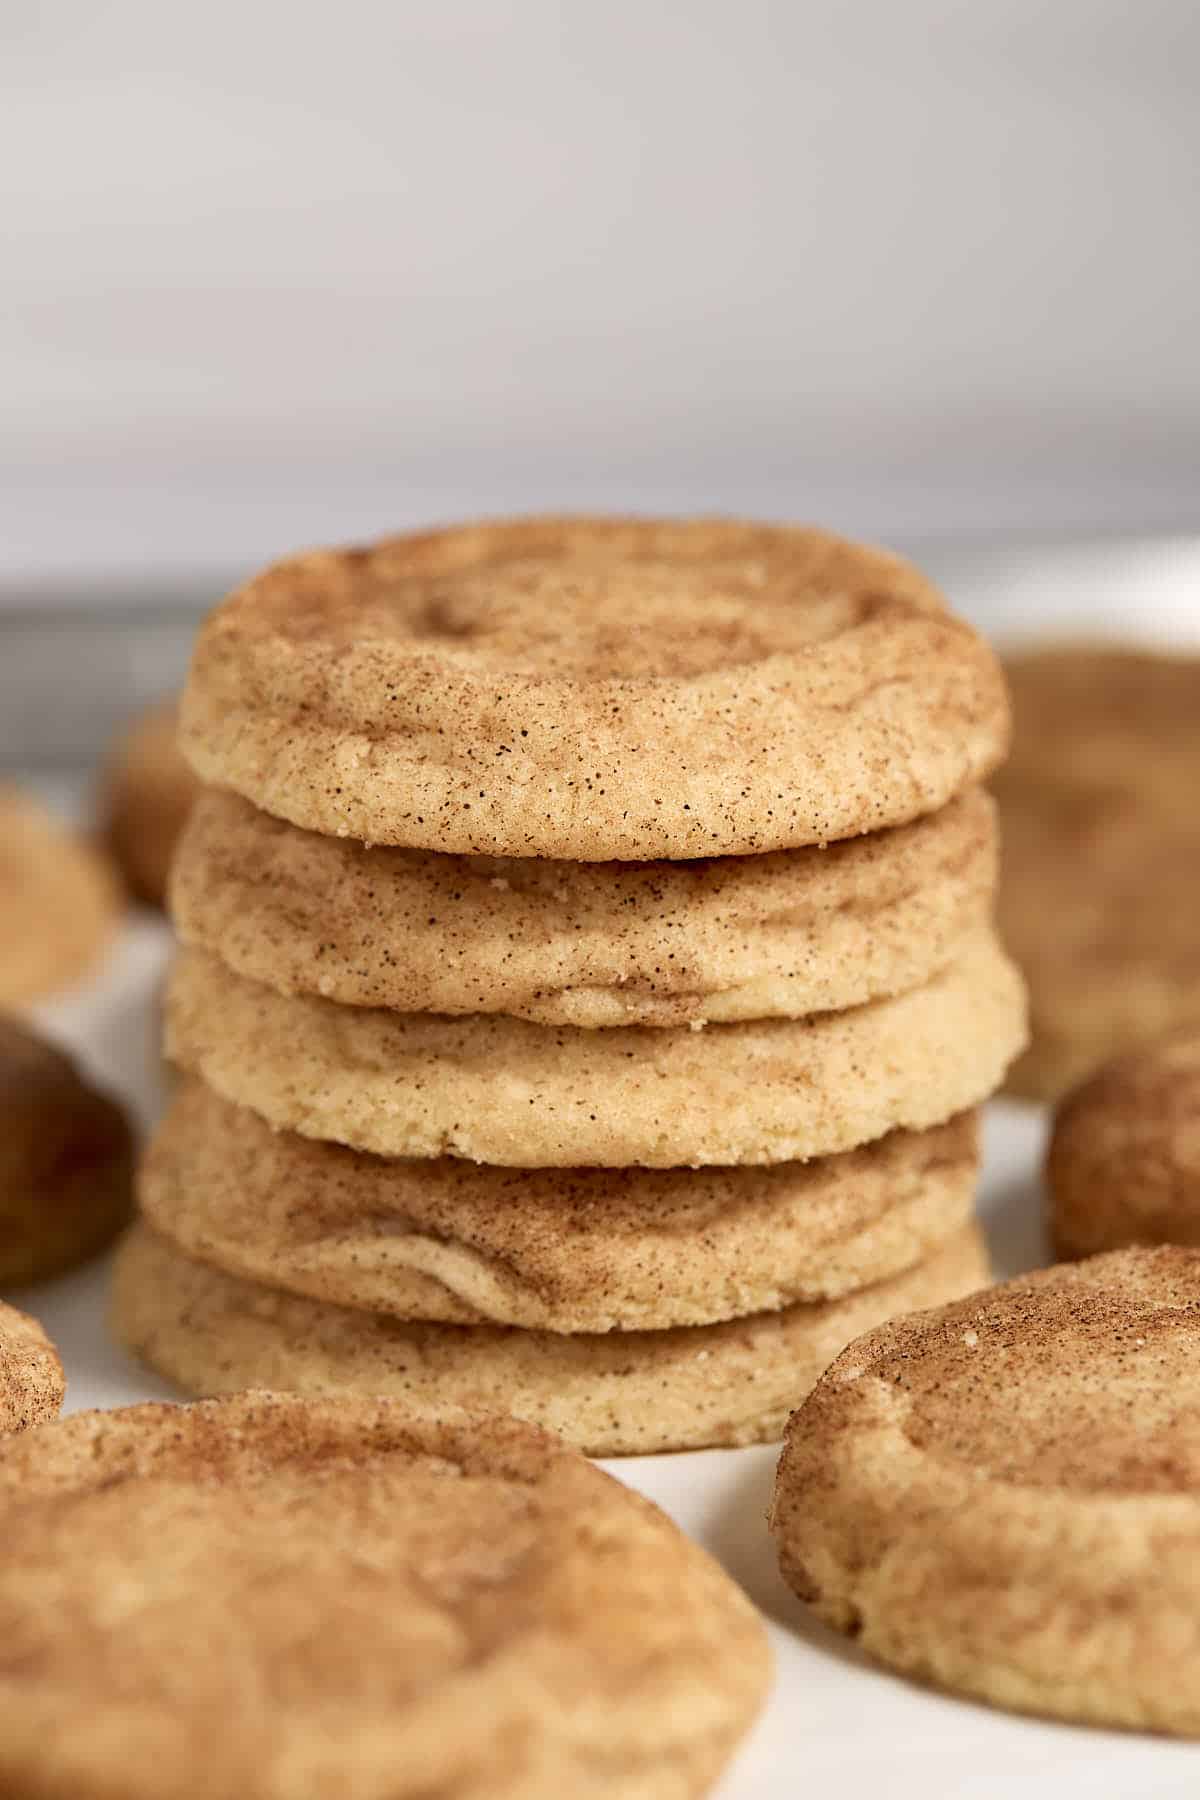
Are you ready for thick, fluffy snickerdoodles? My snickerdoodle recipe delivers just that – thick, fluffy, slightly tangy cookies that taste of cinnamon and sugar sweetness.
How do you get thick, fluffy snickerdoodle cookies? It’s all in the technique, friend.
In this post, you’ll learn all the easy tricks and a couple of out-of-the-ordinary secrets that will make this dessert the one everyone begs you to make again and again.
RELATED: Don't forget to read this guide on the differences between snickerdoodles and sugar cookies. You might also like this snickerdoodle vs. gingersnap guide.
5 Secret Tips for Thick & Fluffy Snickerdoodles
Want the best homemade snickerdoodles? Sifting the flour, using cool ingredients, and avoiding overbaking are the secret tricks to a perfectly fluffy cookie.
Resting and freezing are extra-special techniques that will elevate a great recipe into gourmet cookies.
Curious? Let me explain.
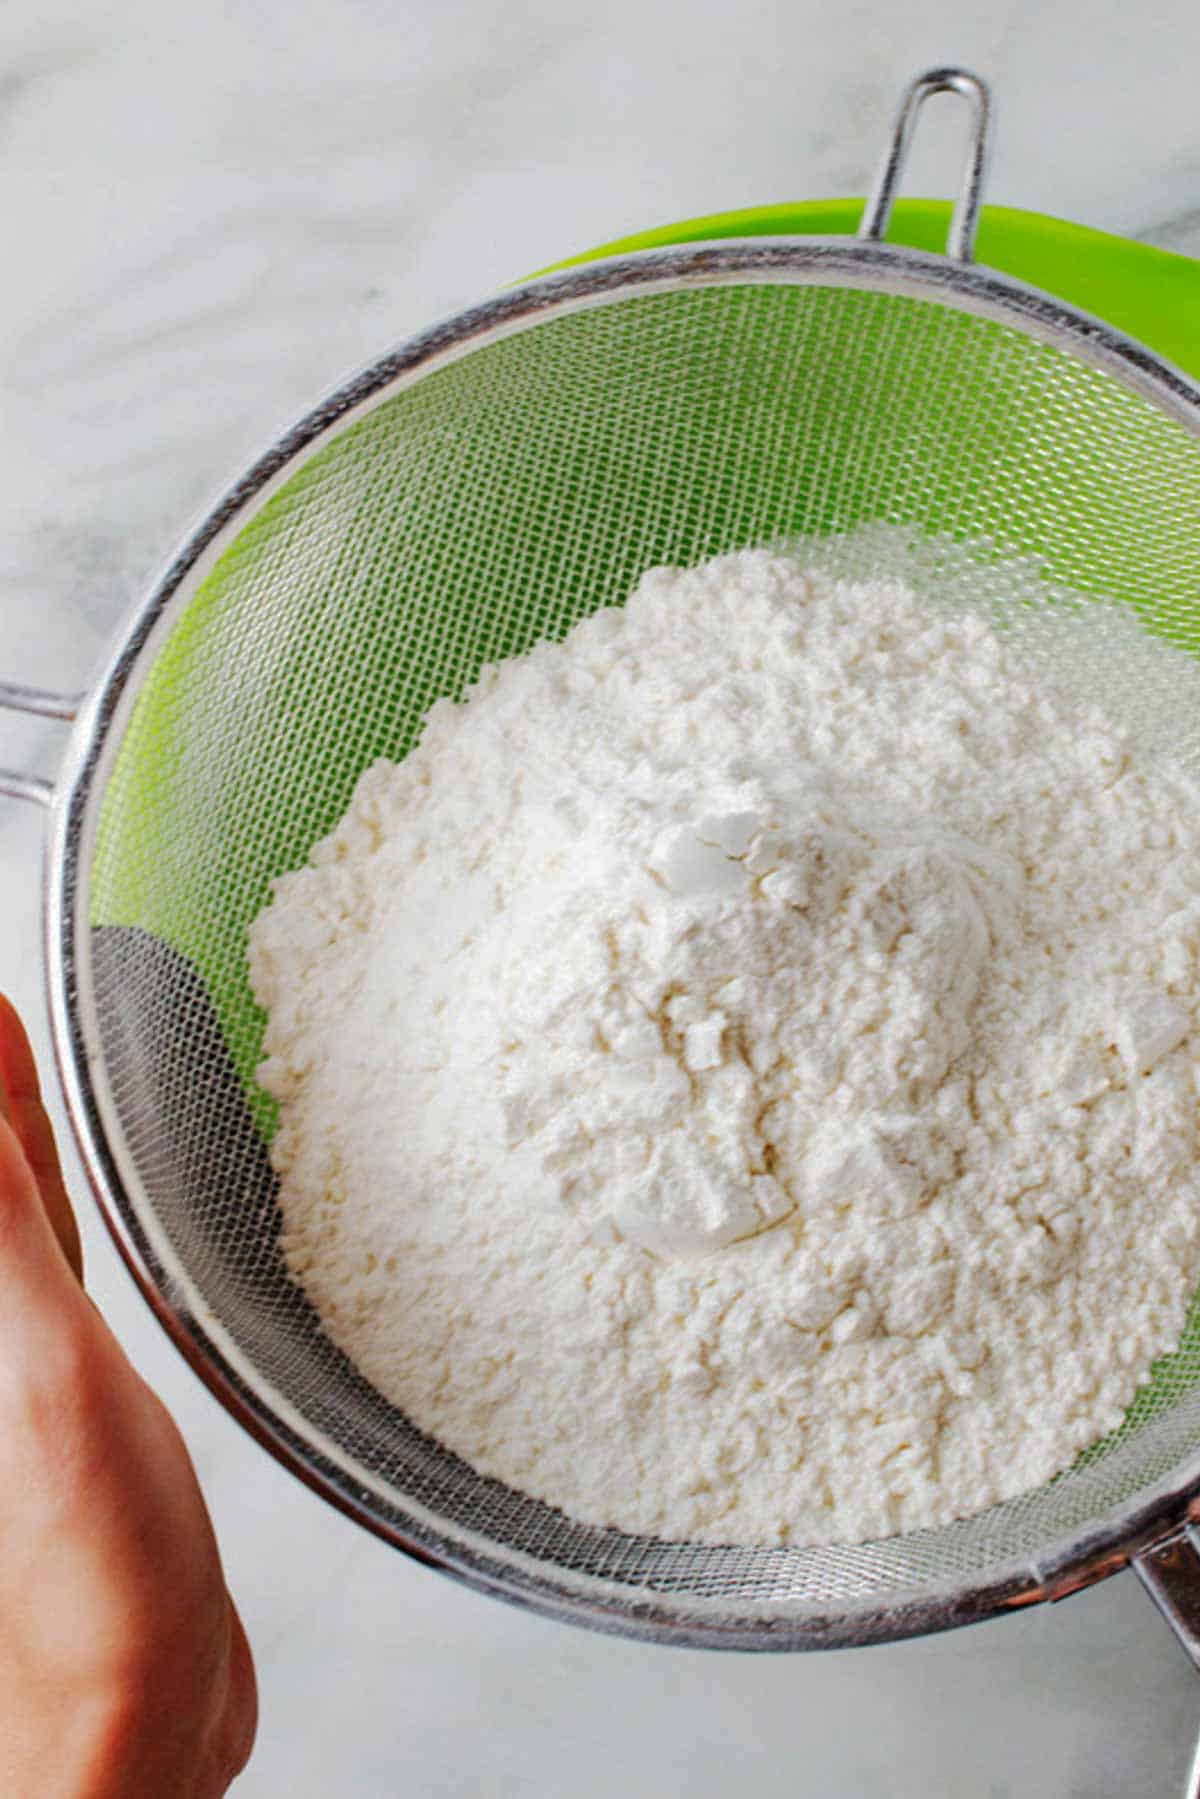
Sift Your Flour
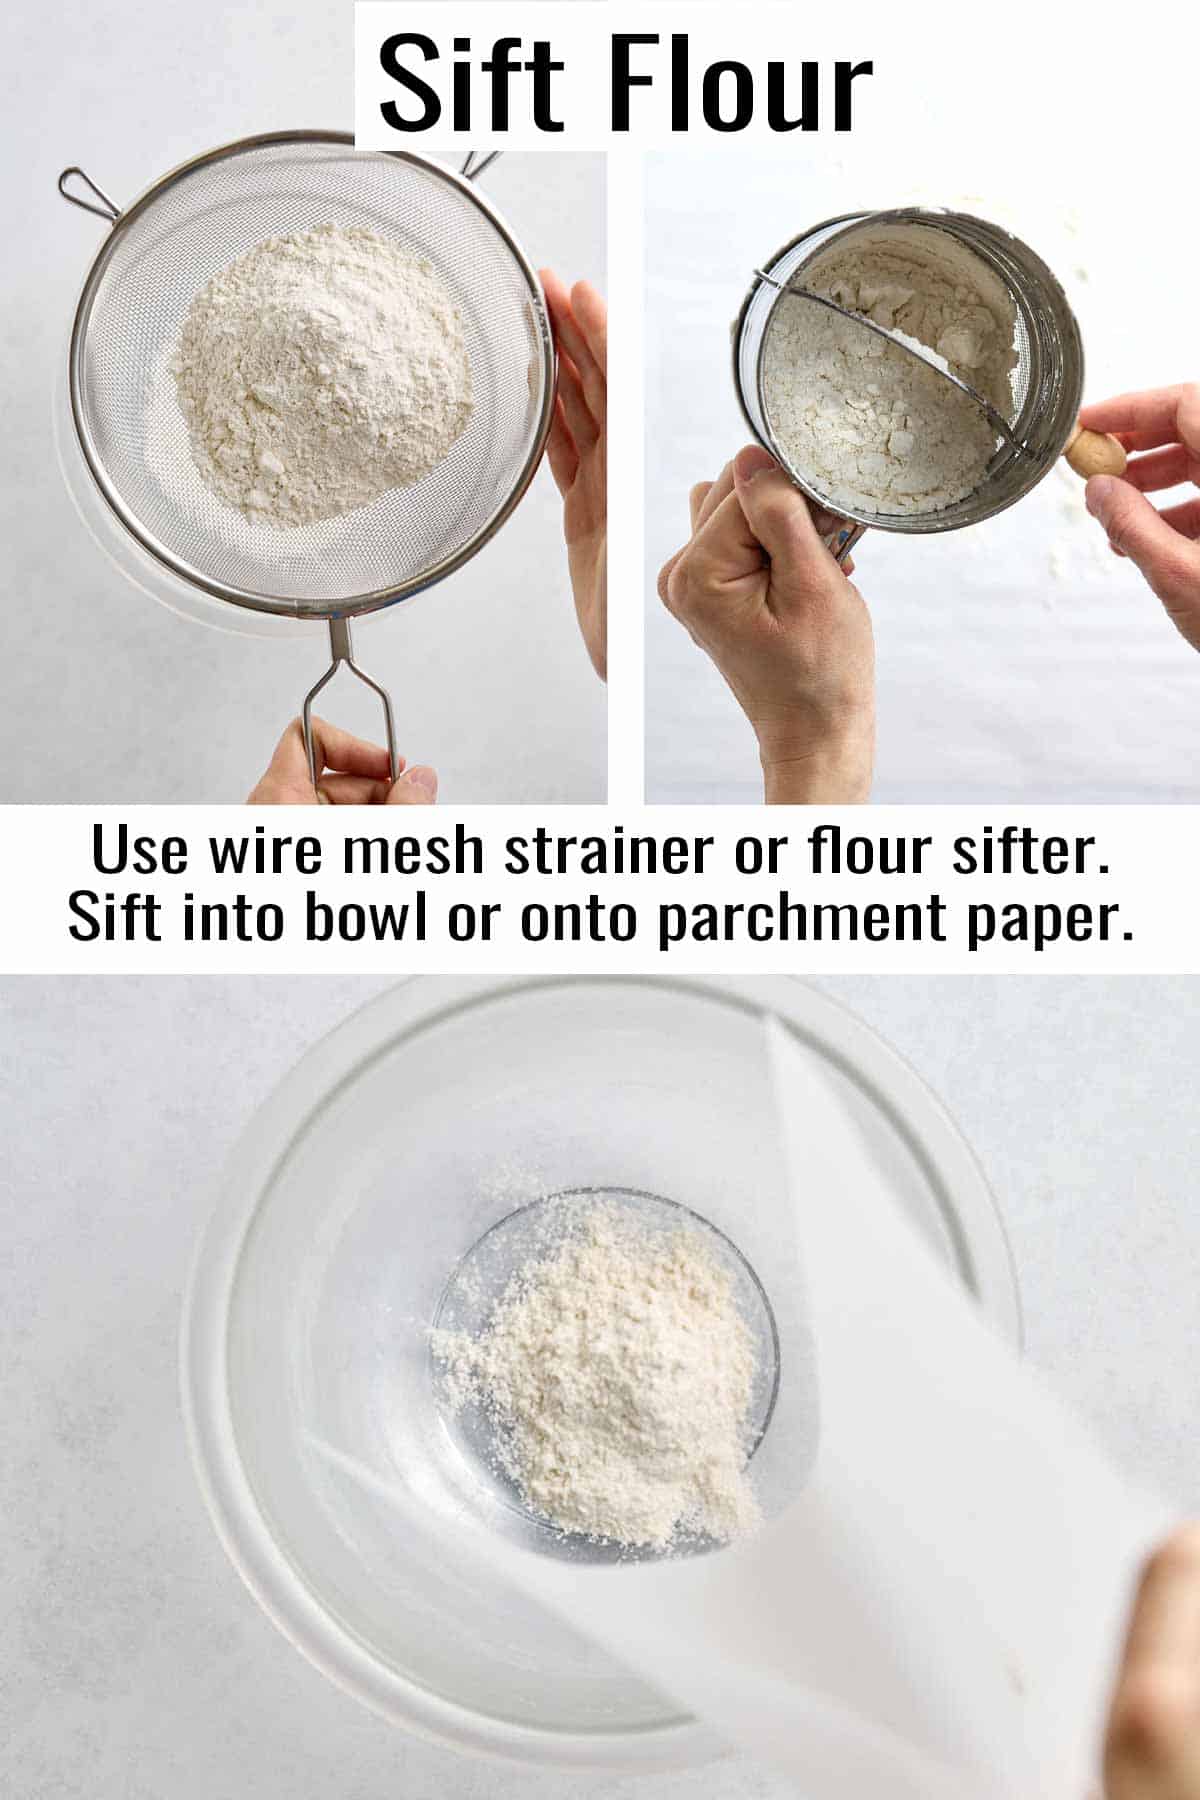
Give your flour some air.
This may sound like an extra step, but it's worth it. Sifting the flour aerates it, resulting in lighter, fluffier cookies.
There are two ways you can sift. Use an actual sifter or use a mesh strainer. Either method is effective, though I prefer using a wire mesh strainer.
You also need either two large bowls or two sheets of parchment paper.
Use one of the following methods to sift the flour two or three times. The result will be a tall pile of lighter, fluffier, softer flour.
- Sifter method. Hold the sifter over a large bowl or sheet of parchment paper. Pour flour into the sifter (no more than ⅔ full). Sift the flour. Then pour the sifted flour back into the sifter. Repeat the sifting process 2 to 3 times.
- Wire mesh strainer method. Pour several cups of flour into a wire mesh strainer. Hold the strainer over a large bowl or sheet of parchment paper. Gently tap the side of the strainer to sift the flour out. Pour the sifted flour back into the mesh strainer. Repeat the process 2 to 3 times.
After sifting, weigh the flour with a kitchen scale if you have one. Weighing ingredients will give you more consistency and precision than measuring by volume.
Read more about the benefits of using a kitchen scale.
Don’t Use Warm Ingredients
If you use butter and eggs that are at the right temperature, thick and fluffy classic snickerdoodles will be foolproof to make.
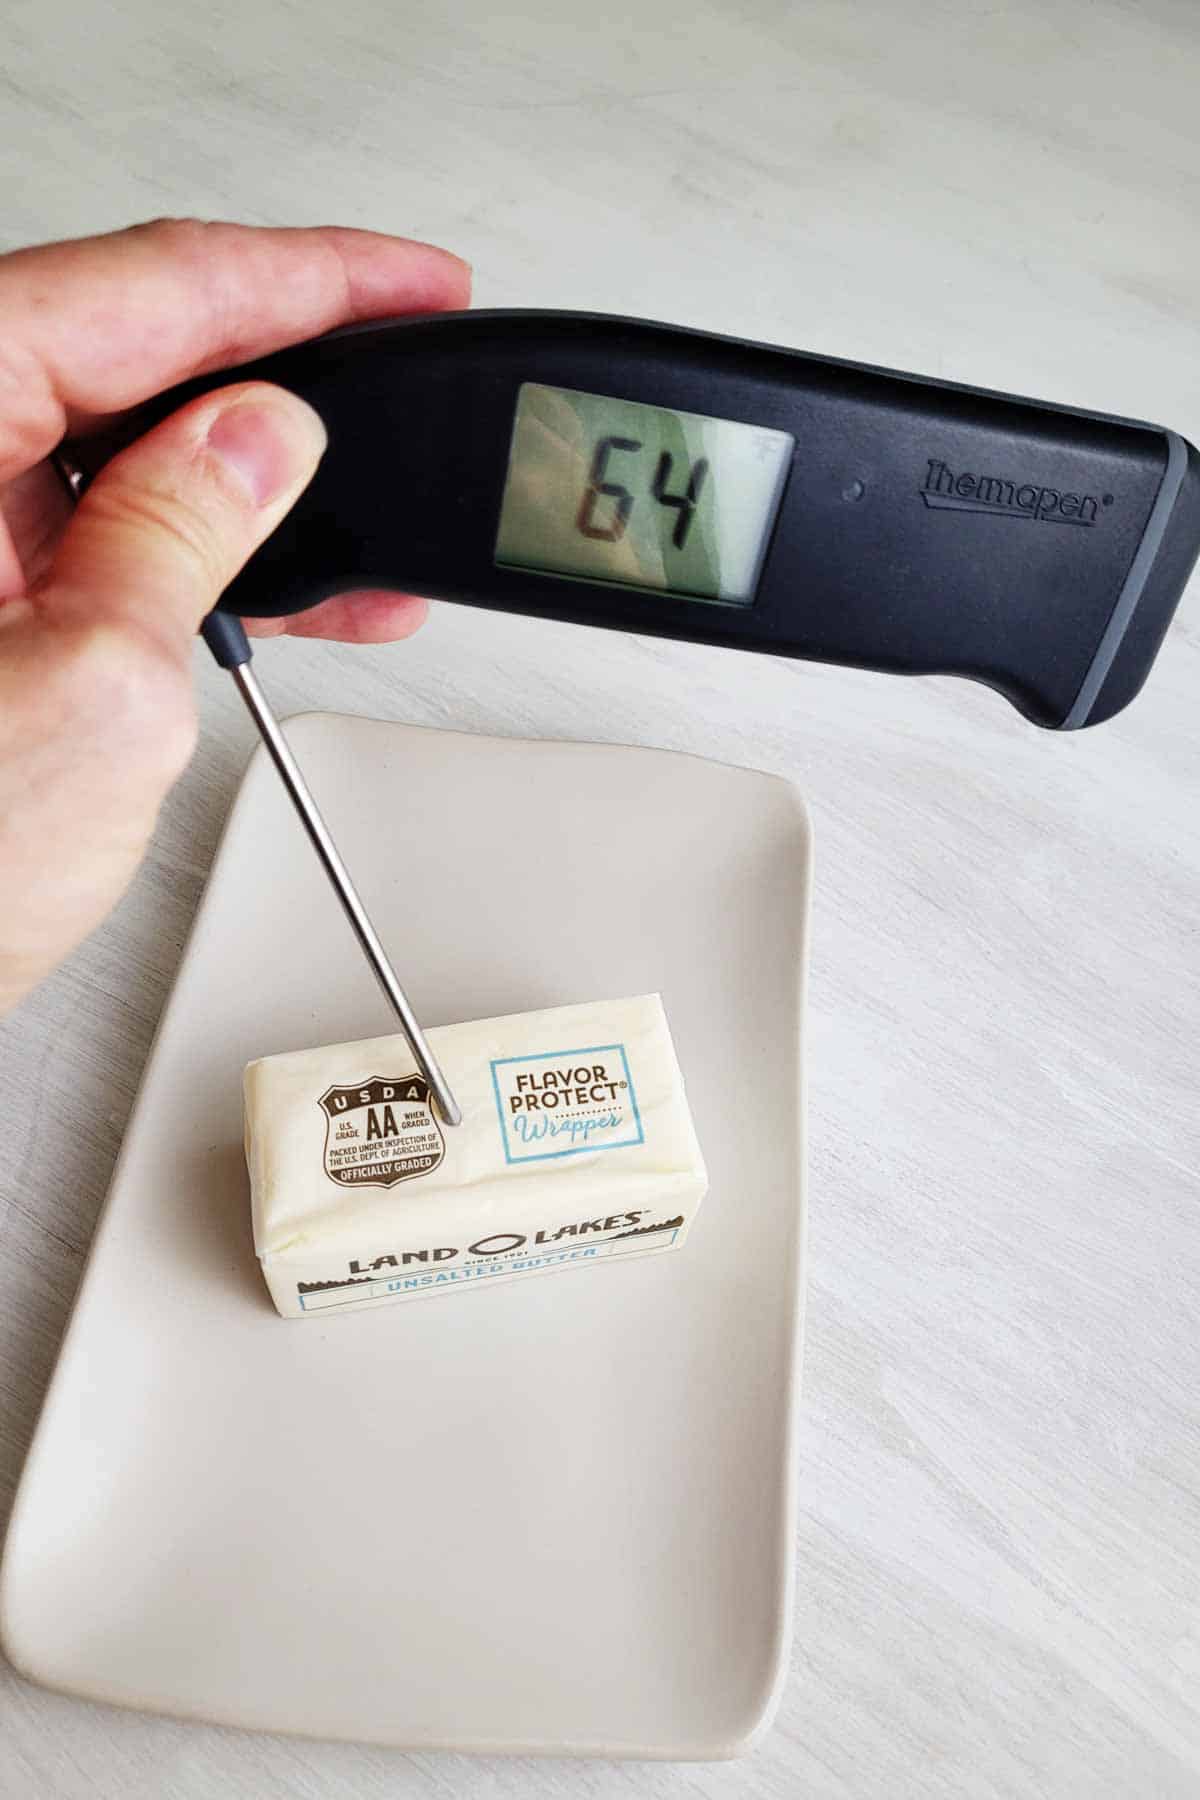
- Cool room-temperature butter (62 to 65°F (16 to 20°C)) is the secret to maintaining the cookie's thickness and fluffiness.
Avoid warm butter because your cookies will spread as they bake. The cookies will have crisp edges but not the chewy centers you’re after.
If you don’t have a thermometer, you can tell (approximately) if butter is at room temperature by touch. Gently press the butter with your finger.
If it gives easily and makes an indent, but doesn't feel soft or melty, then it is likely at room temperature.
- Cold eggs straight from the fridge helps keep the cookie dough at a consistent temperature. Then your cookies will bake irresistibly thick.
Use a Big Cookie Scoop
Baking a thicker cookie dough ball will result in a thick baked cookie. A classic snickerdoodle cookie recipe might call for a 1-inch scoop. But using a 2-inch scoop is a better choice.
The jumbo cookies (about 3 inches in diameter) will be thick, fluffy, and perfect.
If you have a smaller scoop, roll two scoops of dough together.
Don’t Over Bake
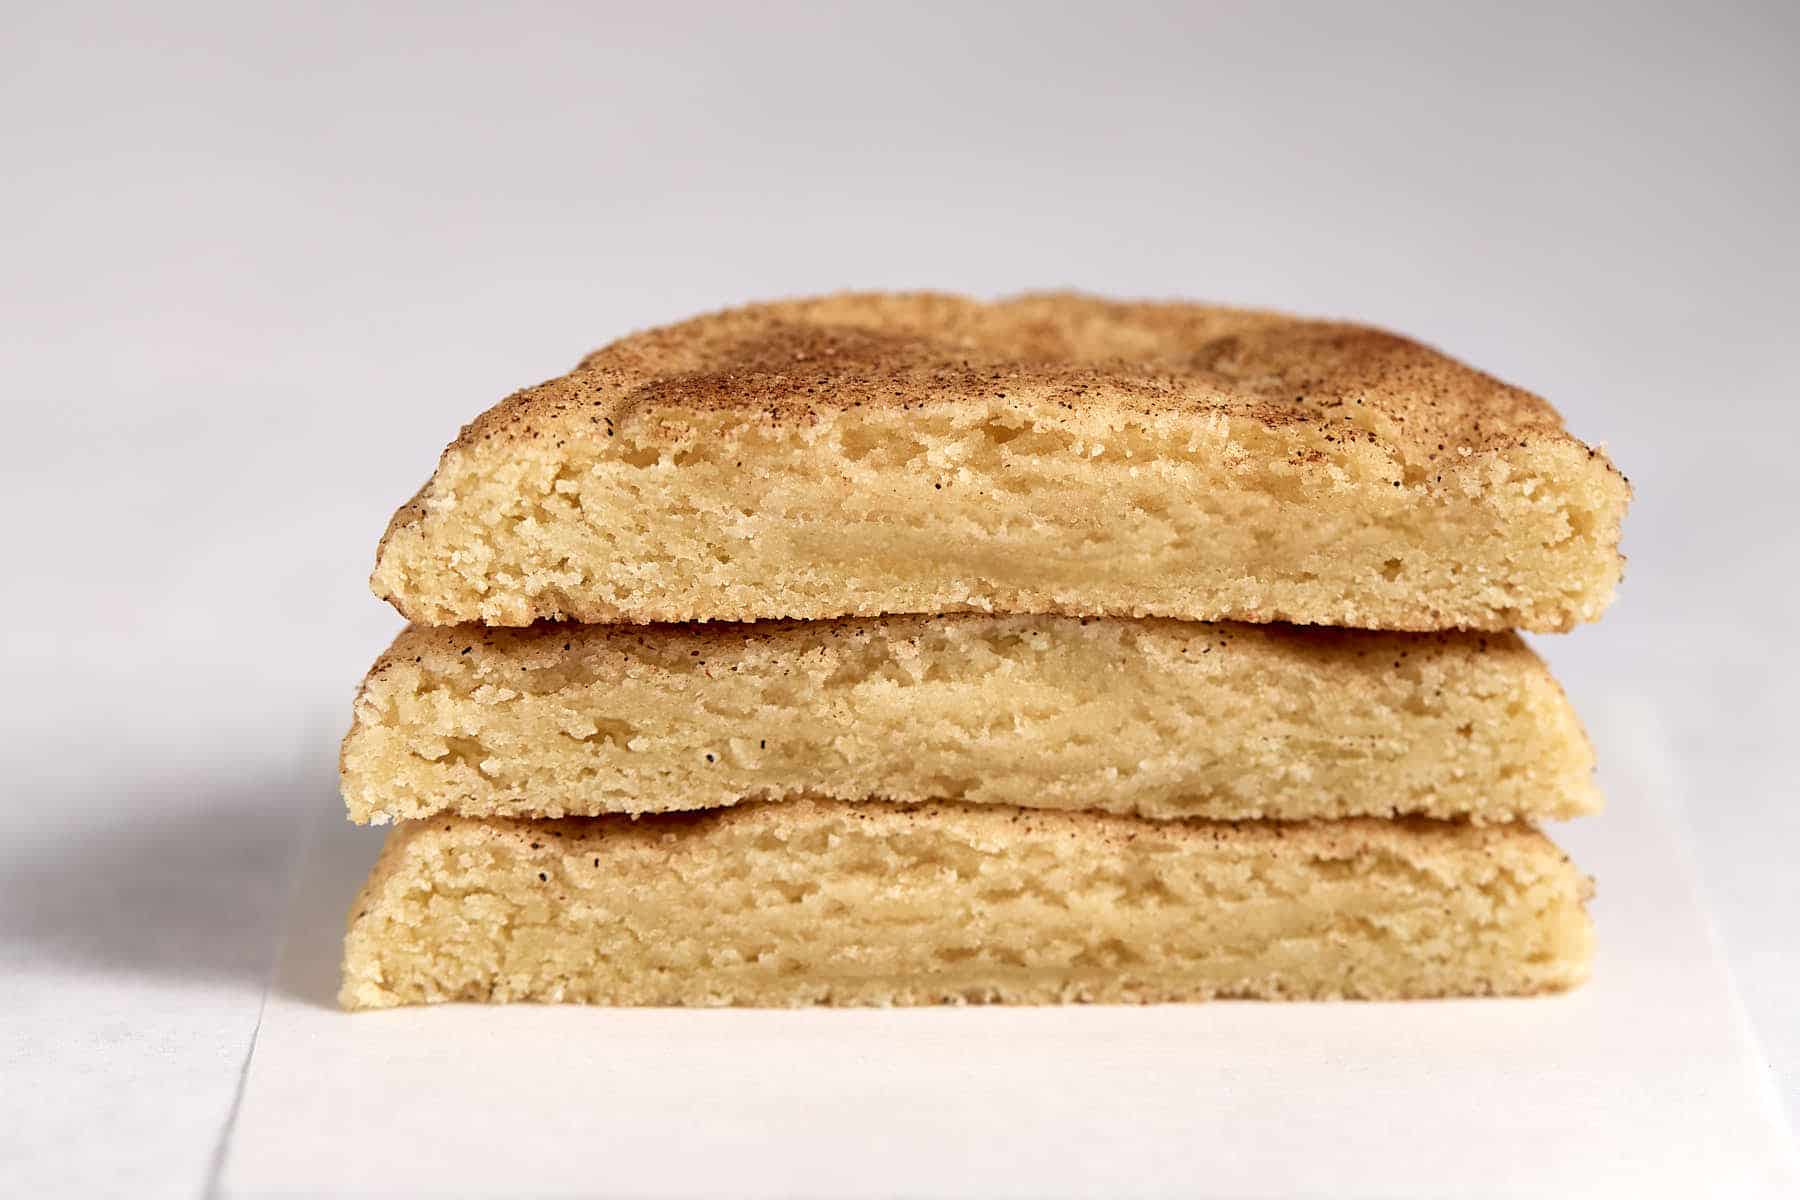
Timing is everything. Bake your soft snickerdoodles until the edges are set, but the centers still have a touch of gooeyness.
This sweet spot gives them their heavenly fluffiness and a chewy texture that will keep you coming back for more.
Trust the process—the residual heat from the pan will work its magic and finish baking the cookies to perfection.
Let the Cookies Rest

Rest – also known as the art of patience -- will be worth the effort.
Once your favorite cookies are out of the oven, let them cool on a wire rack.
Now, let's take it a step further.
After the cookies are completely cool, transfer them to an airtight container. Then let them rest for a couple of hours before devouring them.
This downtime allows the flavors to meld together and the moisture to redistribute in the cookies. The best cookies are the ones that have rested in a container. I was a little bit skeptical the first time I purposely rested these cinnamon sugar cookies.
But now, I can't live without this resting period. You end up with more flavorful cookies with an unbelievably soft, fluffy, chewy texture.
Bonus Tip: Freeze, Thaw, Eat for the Ultimate Taste
If you want a mouthwatering gourmet taste, freeze the cookies for a day or two. Then bring them to room temperature. You’ll be amazed that this classic recipe tastes so much better than your friend's recipe.
This tip works best if you make the buttery cookies ahead for a party. Try it the next time you have a potluck.
You’ll love the convenience of making the treats when you have time. And they’ll be ready when you need them.
After the cookies are completely cool, stack them in columns of 4 or 5 high. Double-wrap the beauties in plastic wrap, tuck them snugly in an airtight freezer container, and freeze.
The morning before serving them, take the container out of the freezer. Remove the plastic wrap and let them come to room temperature on the kitchen counter.
When thawed, transfer the cookies to a serving tray. Soft, fluffy, chewie cookies you won't believe.
Ingredients
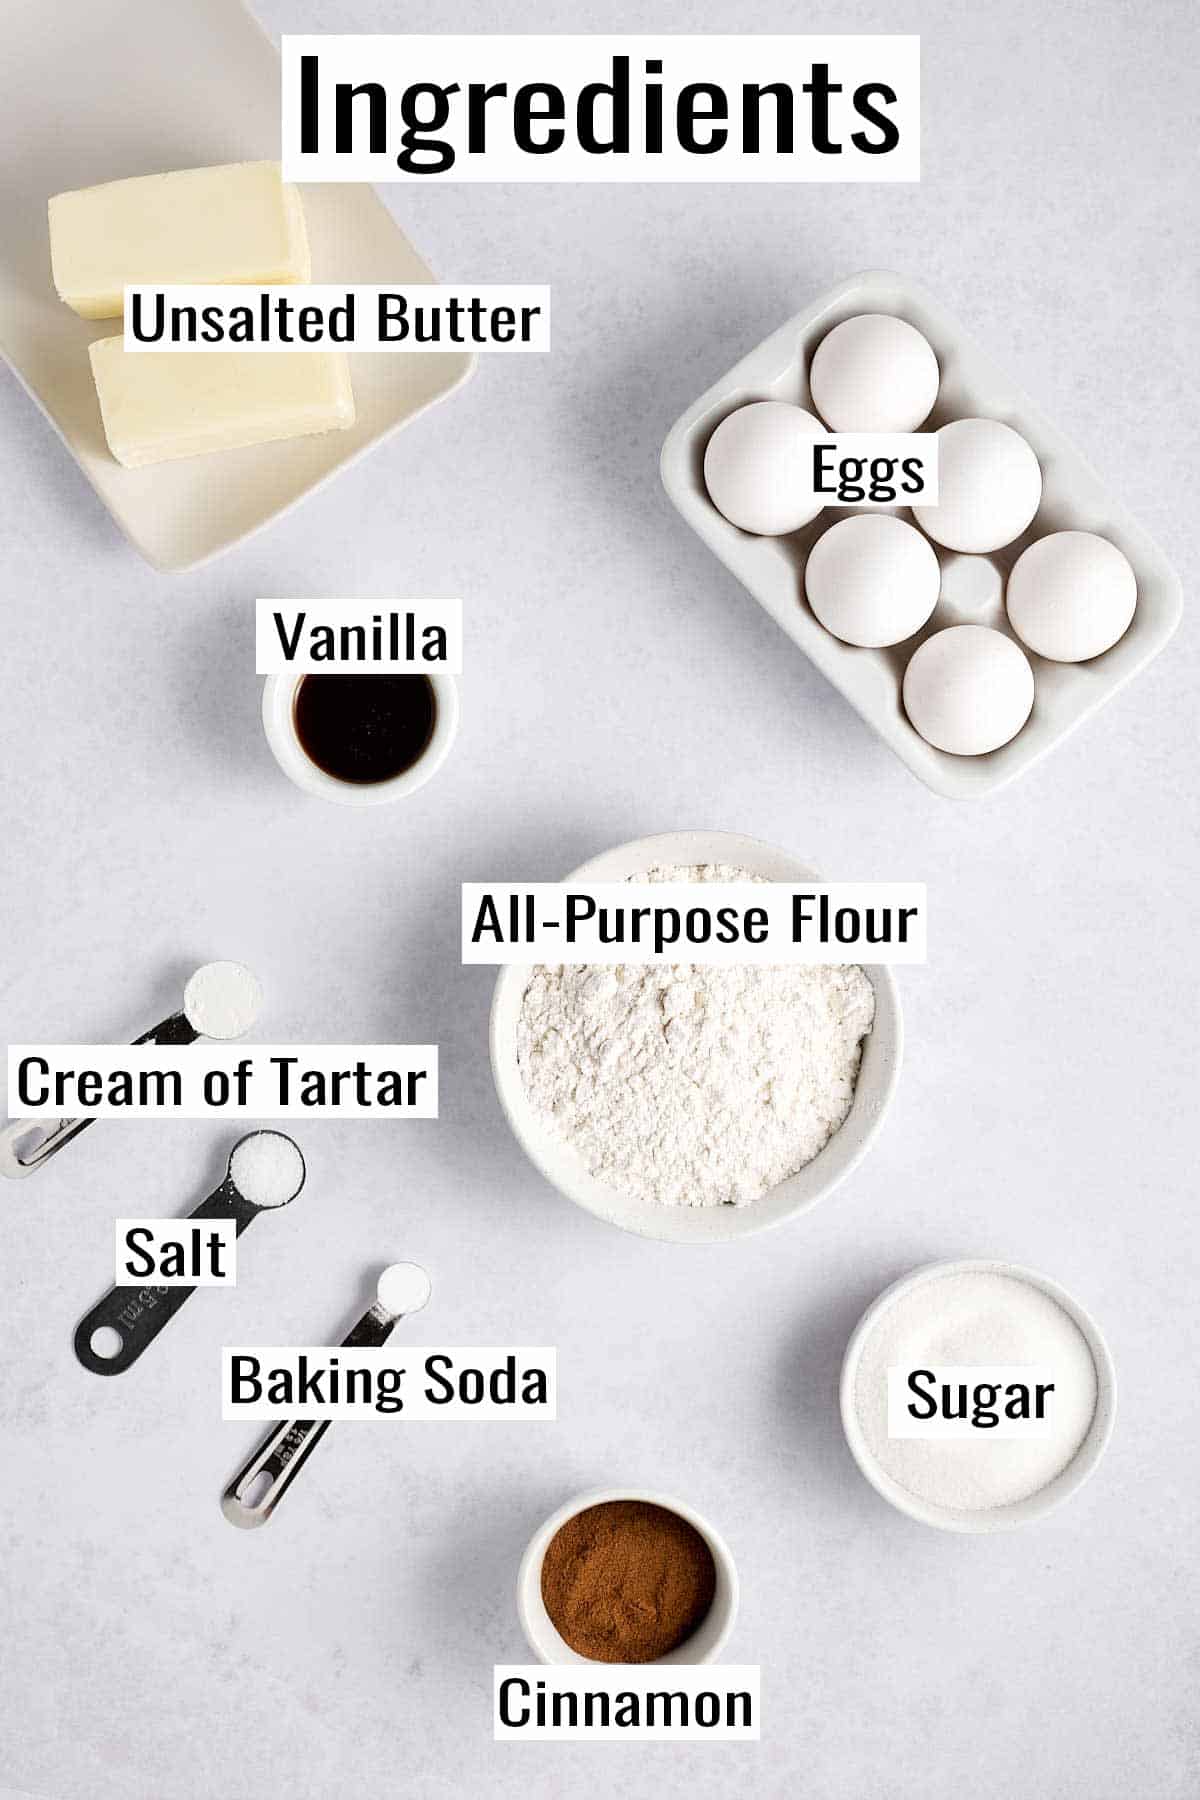
- All-purpose flour. I prefer Gold Medal all-purpose flour over store brands, but you can certainly use your favorite flour.
The trick with the flour is to sift, creating fluffiness. Weighing is also a good habit. You’ll avoid adding too much flour.
- Cream of tartar + baking soda + salt. Cream of tartar plays a role in cookie fluffiness too.
The combination of cream of tartar and baking soda produces a gas that creates air pockets in the dough, causing the cookies to rise.
This leavening action also produces that puffy, soft texture, resulting in light, tender, and fluffy cookies.
And the cream of tartar is the key ingredient responsible for that tangy flavor you expect from these delicious cookies.
- Unsalted butter. The butter temperature is crucial to the success of this recipe.
You need cool, room-temperature butter between 62 to 65°F (16 to 20°C).
Warm butter will cause the cookies to spread too much, leaving you with flat cookies. Not the thick, fluffy ones you were after.
Butter that is too cold will be hard to beat. However, cold butter is better than warm butter. You can beat the butter until it softens.
If the butter gets too warm, chilling it in the fridge is the only fix.
You’ll also want to use unsalted butter to control the salt in the cookie. However, I’ve used salted butter before, and the cookies are just a little salty. But still fine.
- White sugar. Use sugar to sweeten the cookie dough and for the cinnamon-sugar coating.
- Cold eggs, straight from the fridge. Using cold eggs keeps the dough cool, resulting in thicker cookies that don’t spread all over the place.
- Vanilla extract. Use your favorite vanilla.
- Ground cinnamon. Combine cinnamon and sugar for the cookie dough coating.
RELATED: You may also be interested in frosted Funfetti cake mix cookies. These gooey, frosted cookies are topped with colorful sprinkles.
Substitutions
- Swap out the cream of tartar + baking soda for baking powder instead. Baking powder is an excellent cream of tartar substitute.
And with baking powder in place of cream of tartar, you can skip the baking soda too. See that in action in these baking powder snickerdoodles.
Variations
- No cream of tartar pumpkin snickerdoodles. These are the best snickerdoodle cookies to serve in the fall. Or bake up the chewiest brown butter pumpkin snickerdoodles.
- Mini snickerdoodles. Try these mini chewy cookies on top of a small bowl of vanilla ice cream.


Directions
Prep the Recipe
- PREHEAT the oven to 400°F (225°C).
- REMOVE THE BUTTER from the fridge. Bring it to cool room temperature (62 to 65°F (16 to 20°C)).
- SIFT several cups of flour back and forth between 2 large bowls 3 to 4 times.
Mix and Bake
- WEIGH 396 grams of sifted flour on a digital kitchen scale and place it in a bowl. If you don't have a scale, use 3 cups + 1 tablespoon of flour. (Measure carefully. Spoon the sifted flour into the measuring cup and scrape the cup flat with the straight edge of a knife.)
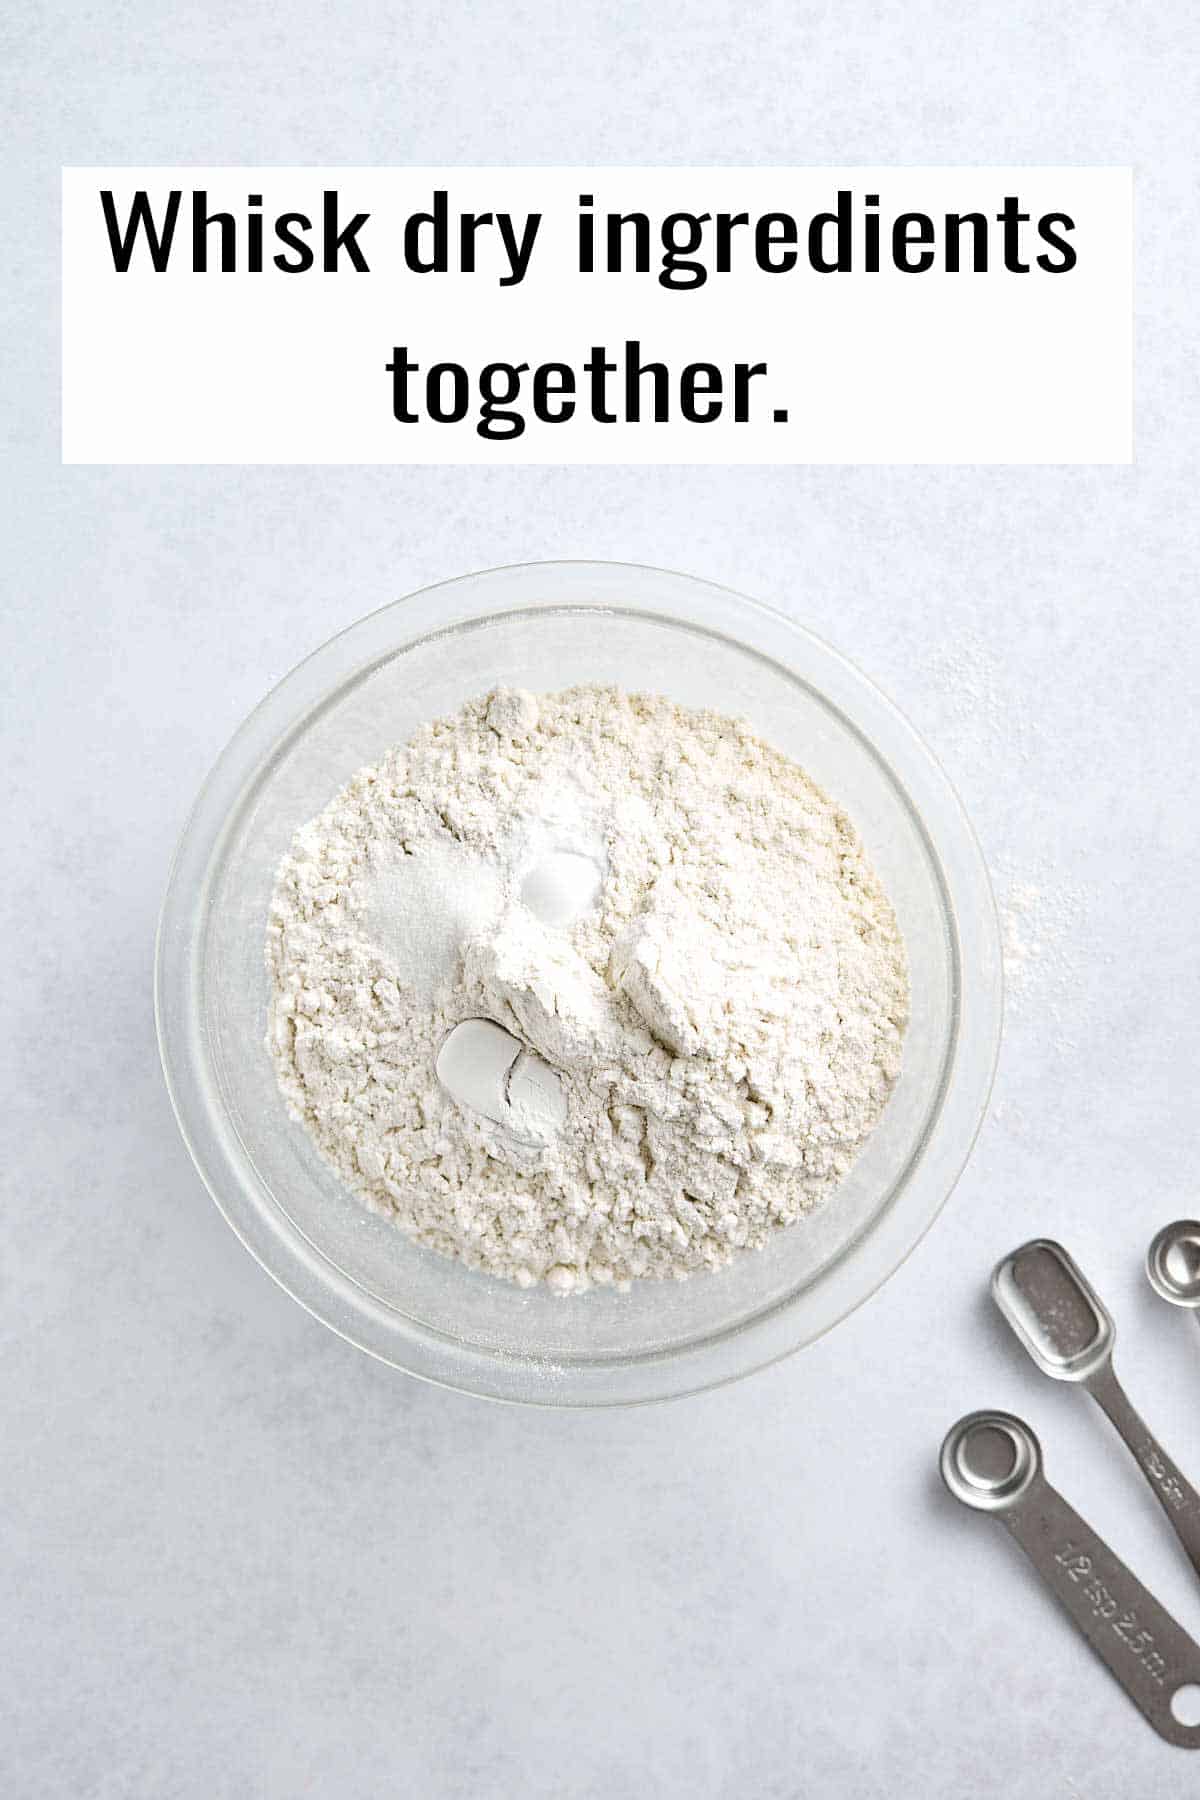
- WHISK the cream of tartar, baking soda, and salt into the flour.
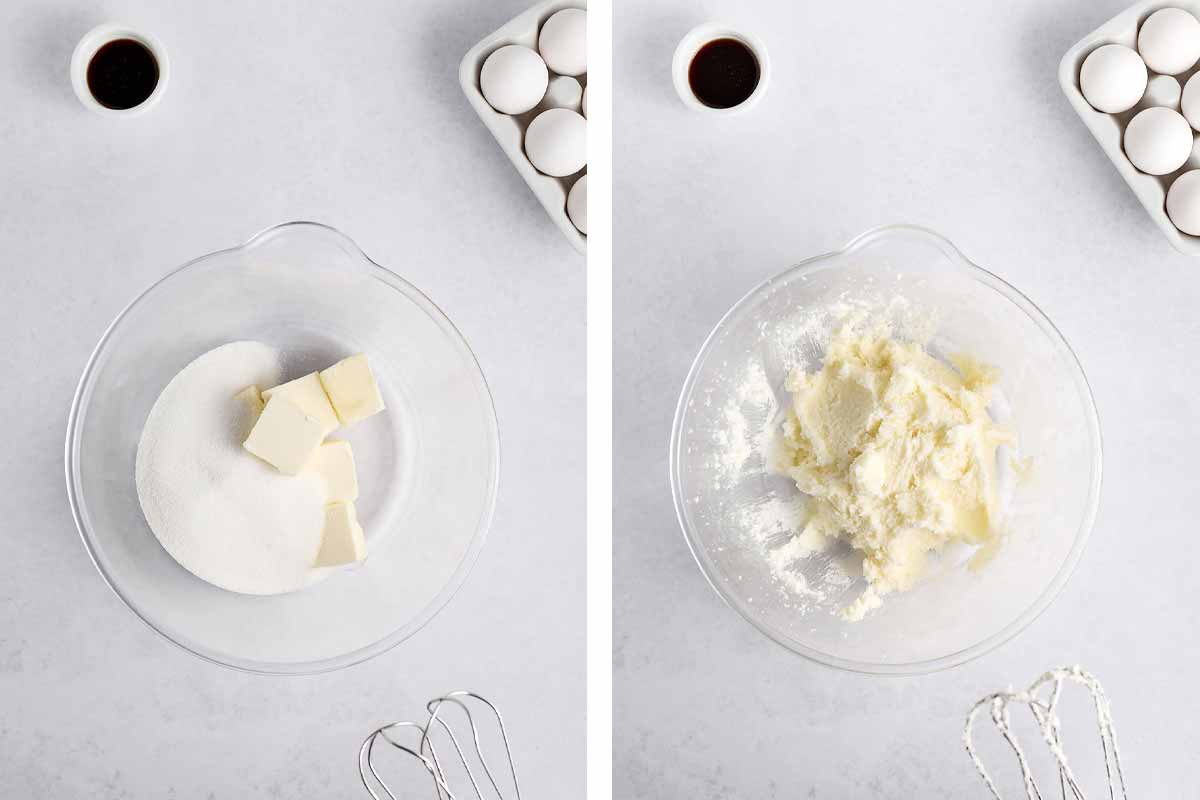
- In a separate bowl, CREAM 330 grams (1⅔ cup) of sugar and butter with an electric hand mixer on high for 1½ to 3 minutes. The texture will progress from sandy to creamy. If you prefer, use a stand mixer with the paddle attachment.
Please note: The butter should be between 62 to 65°F (16 to 20°C). Colder butter could prevent the cookie from spreading enough as it cooks.
Warmer butter will cause the cookie to spread too much when baking and may result in a crispy cookie. If the butter gets too warm, refrigerate it before creaming it.
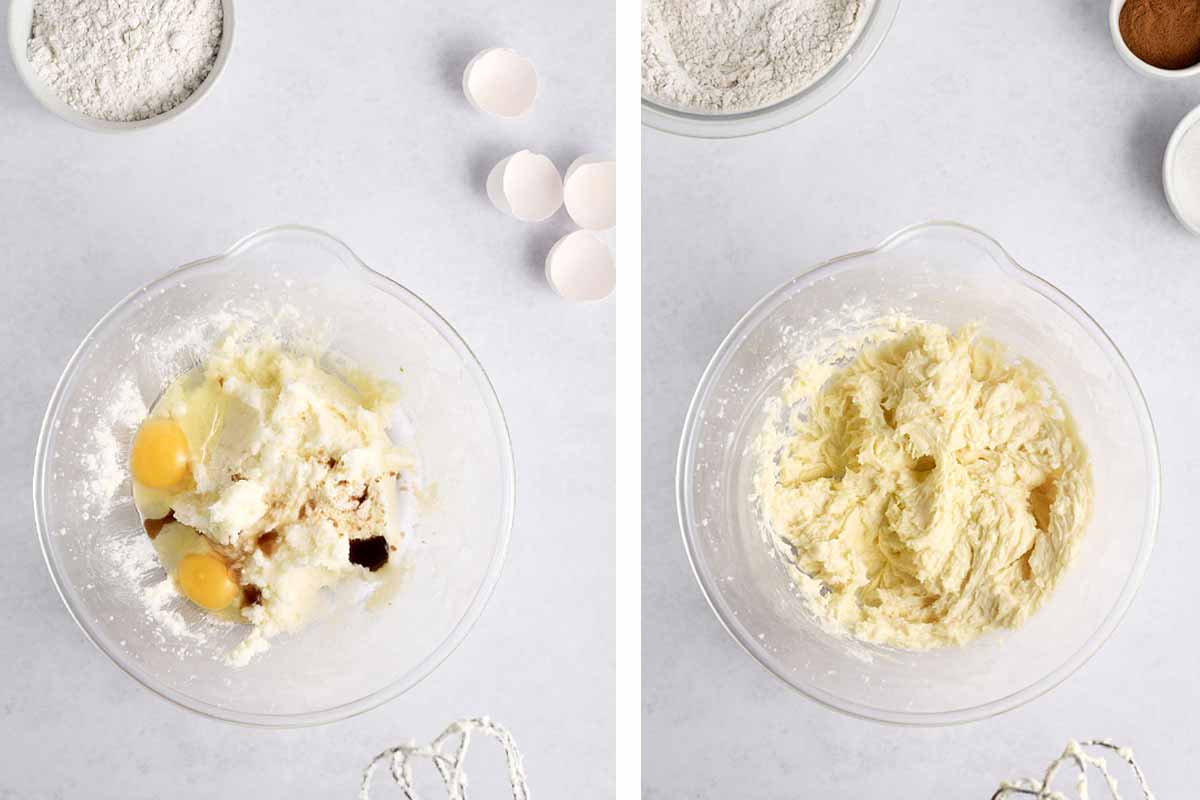
- BLEND the vanilla and eggs into the creamed sugar and mix on medium speed for 30 seconds.
Please note: Take the eggs straight from the refrigerator before blending. They should be cold.
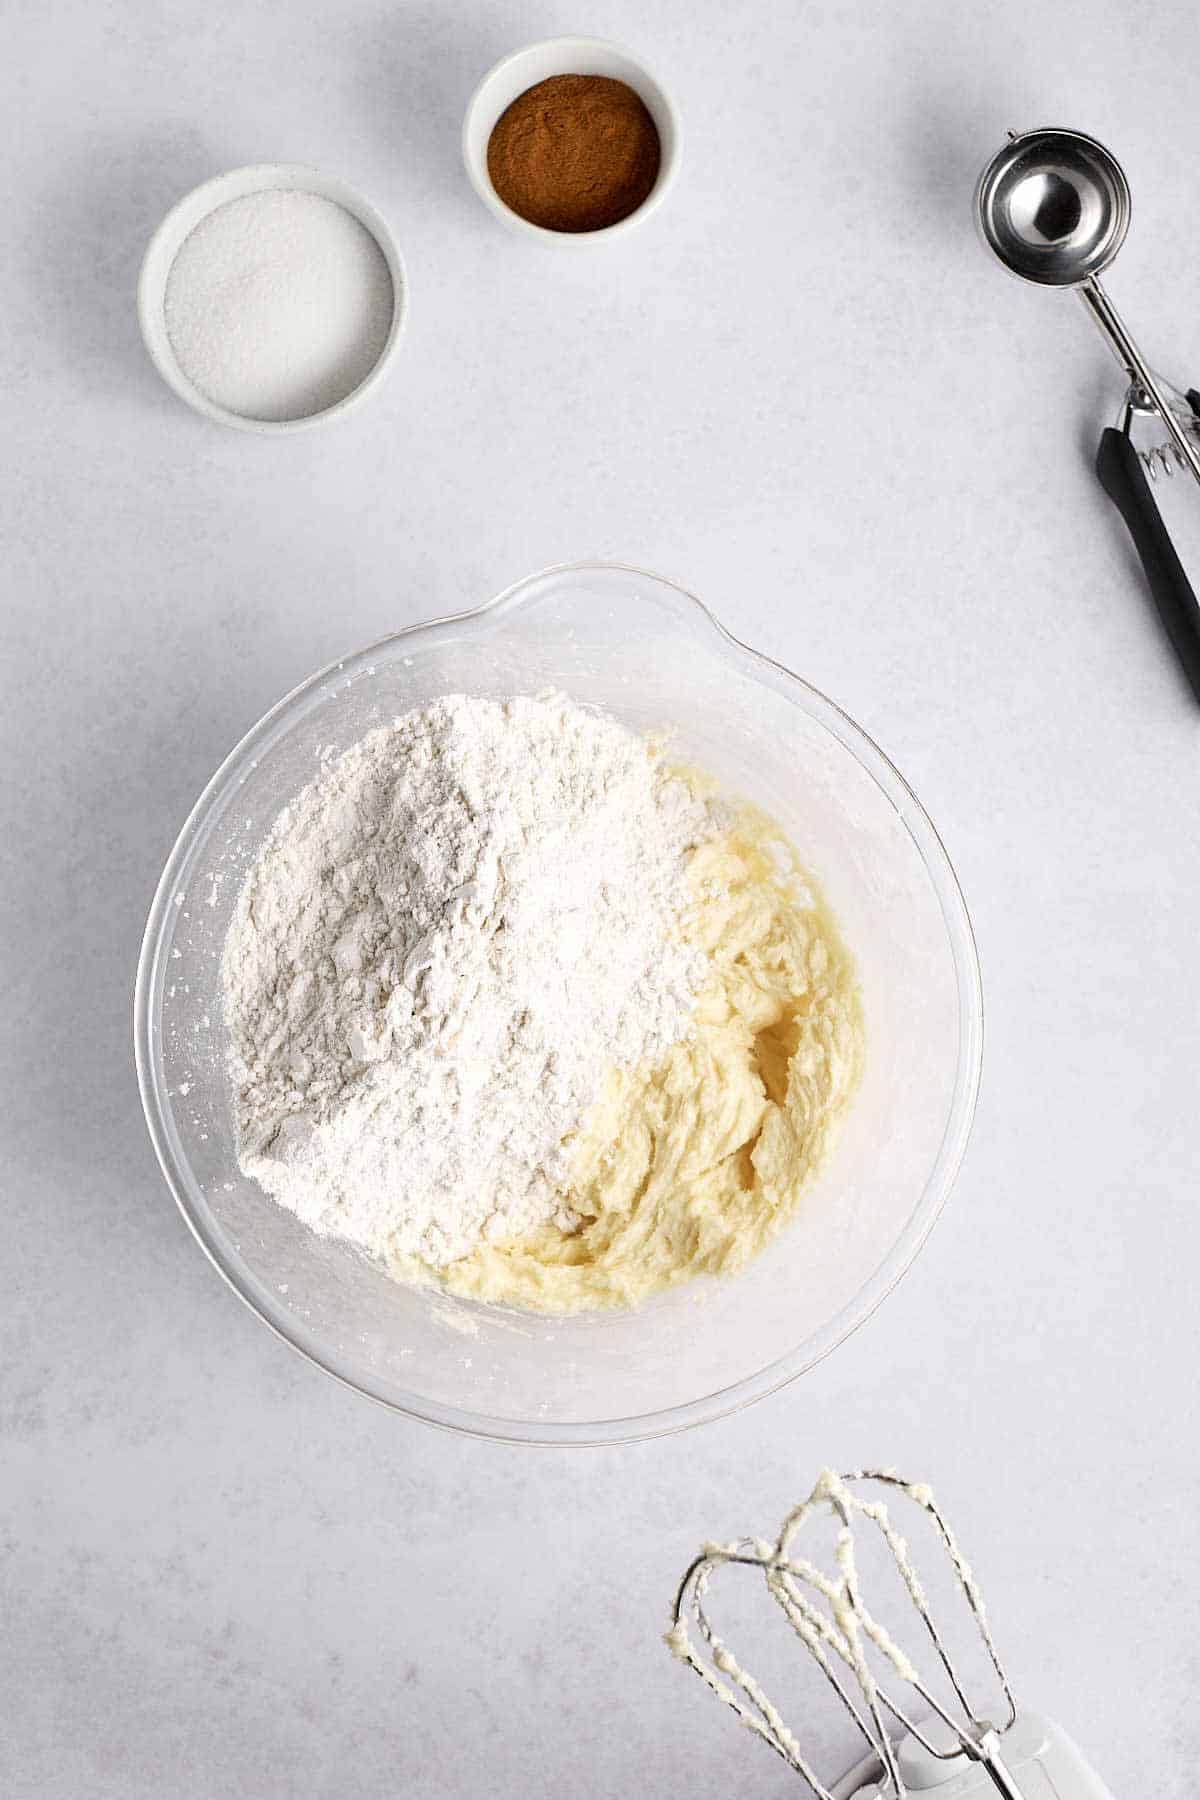
- MIX the dry ingredients into the wet ingredients. Use an electric mixer on low until the flour mixture is incorporated. Scrape the sides of the mixing bowl with a rubber spatula and blend again.
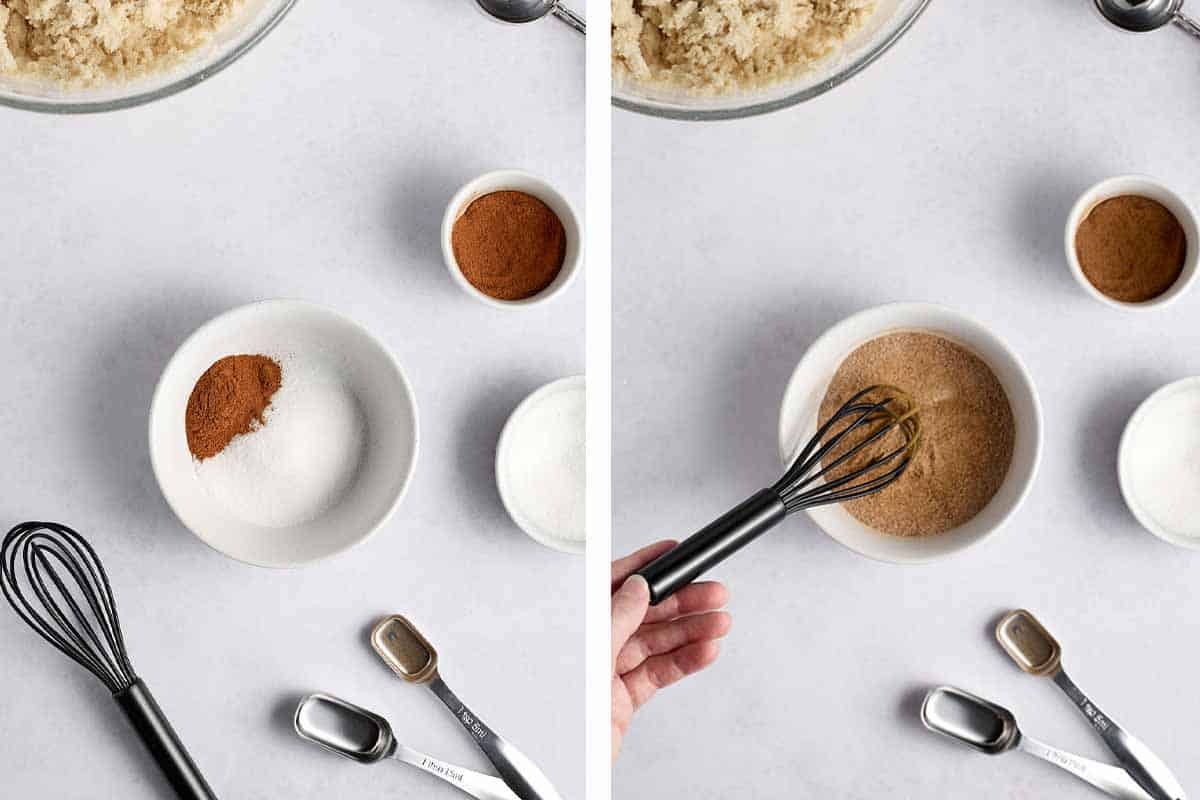
- In a small, shallow bowl, STIR the cinnamon with 38 grams (3 tablespoons) of white sugar until well blended.
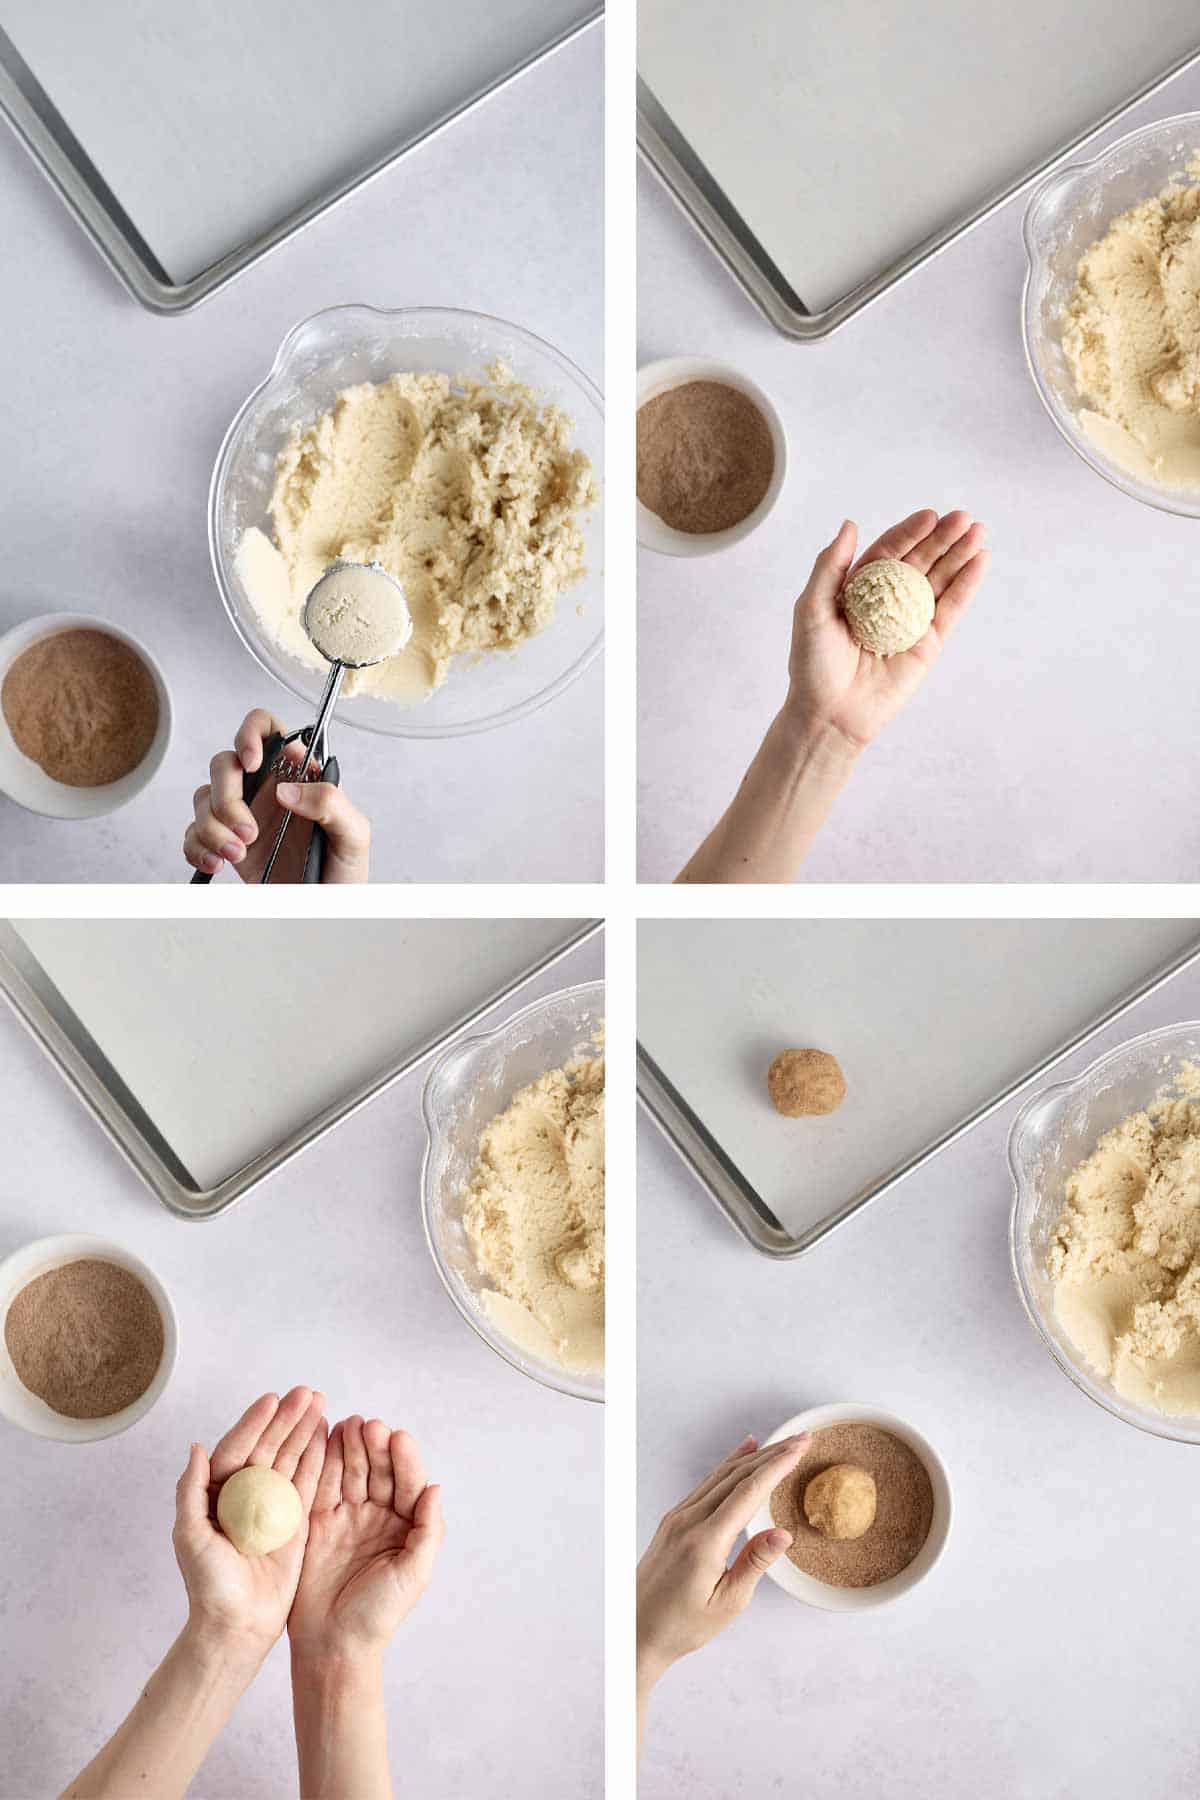
- SCOOP the cookie dough with a 2-tablespoon cookie scoop.
- ROLL the cookie dough ball in your palms until smooth. Then roll the ball in the cinnamon-sugar mixture until completely coated.
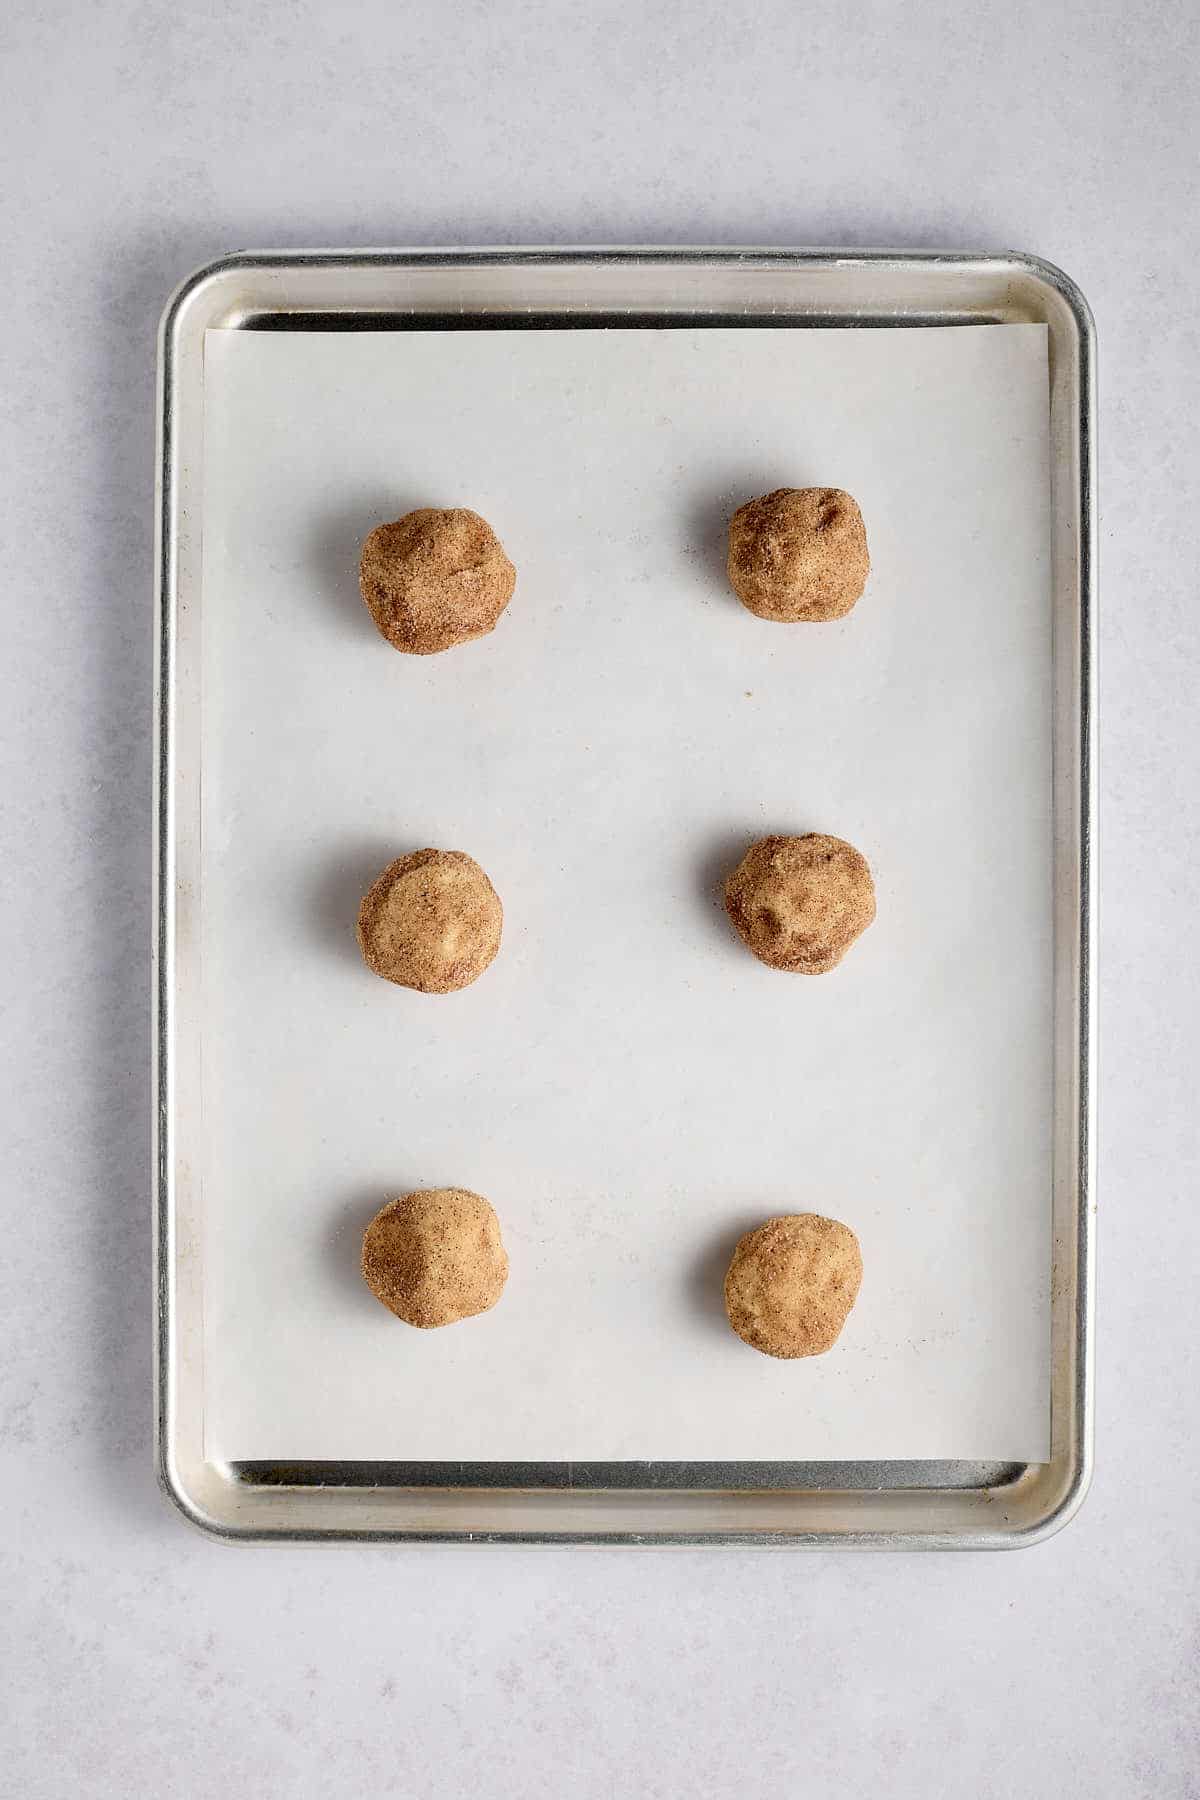
- PLACE the cookie dough ball on a heavy-duty aluminum cookie sheet lined with parchment paper (or a silicone mat).
- REPEAT rolling the cookie dough balls in the cinnamon/sugar. Place the balls on the baking sheet 2 to 3 inches apart.
- BAKE for 8 to 10 minutes until the edges are set, but the middle does not look completely solid. Use your judgment here. The cookie should not be doughy. Cook until the cookies look almost done.
Rest and Cool
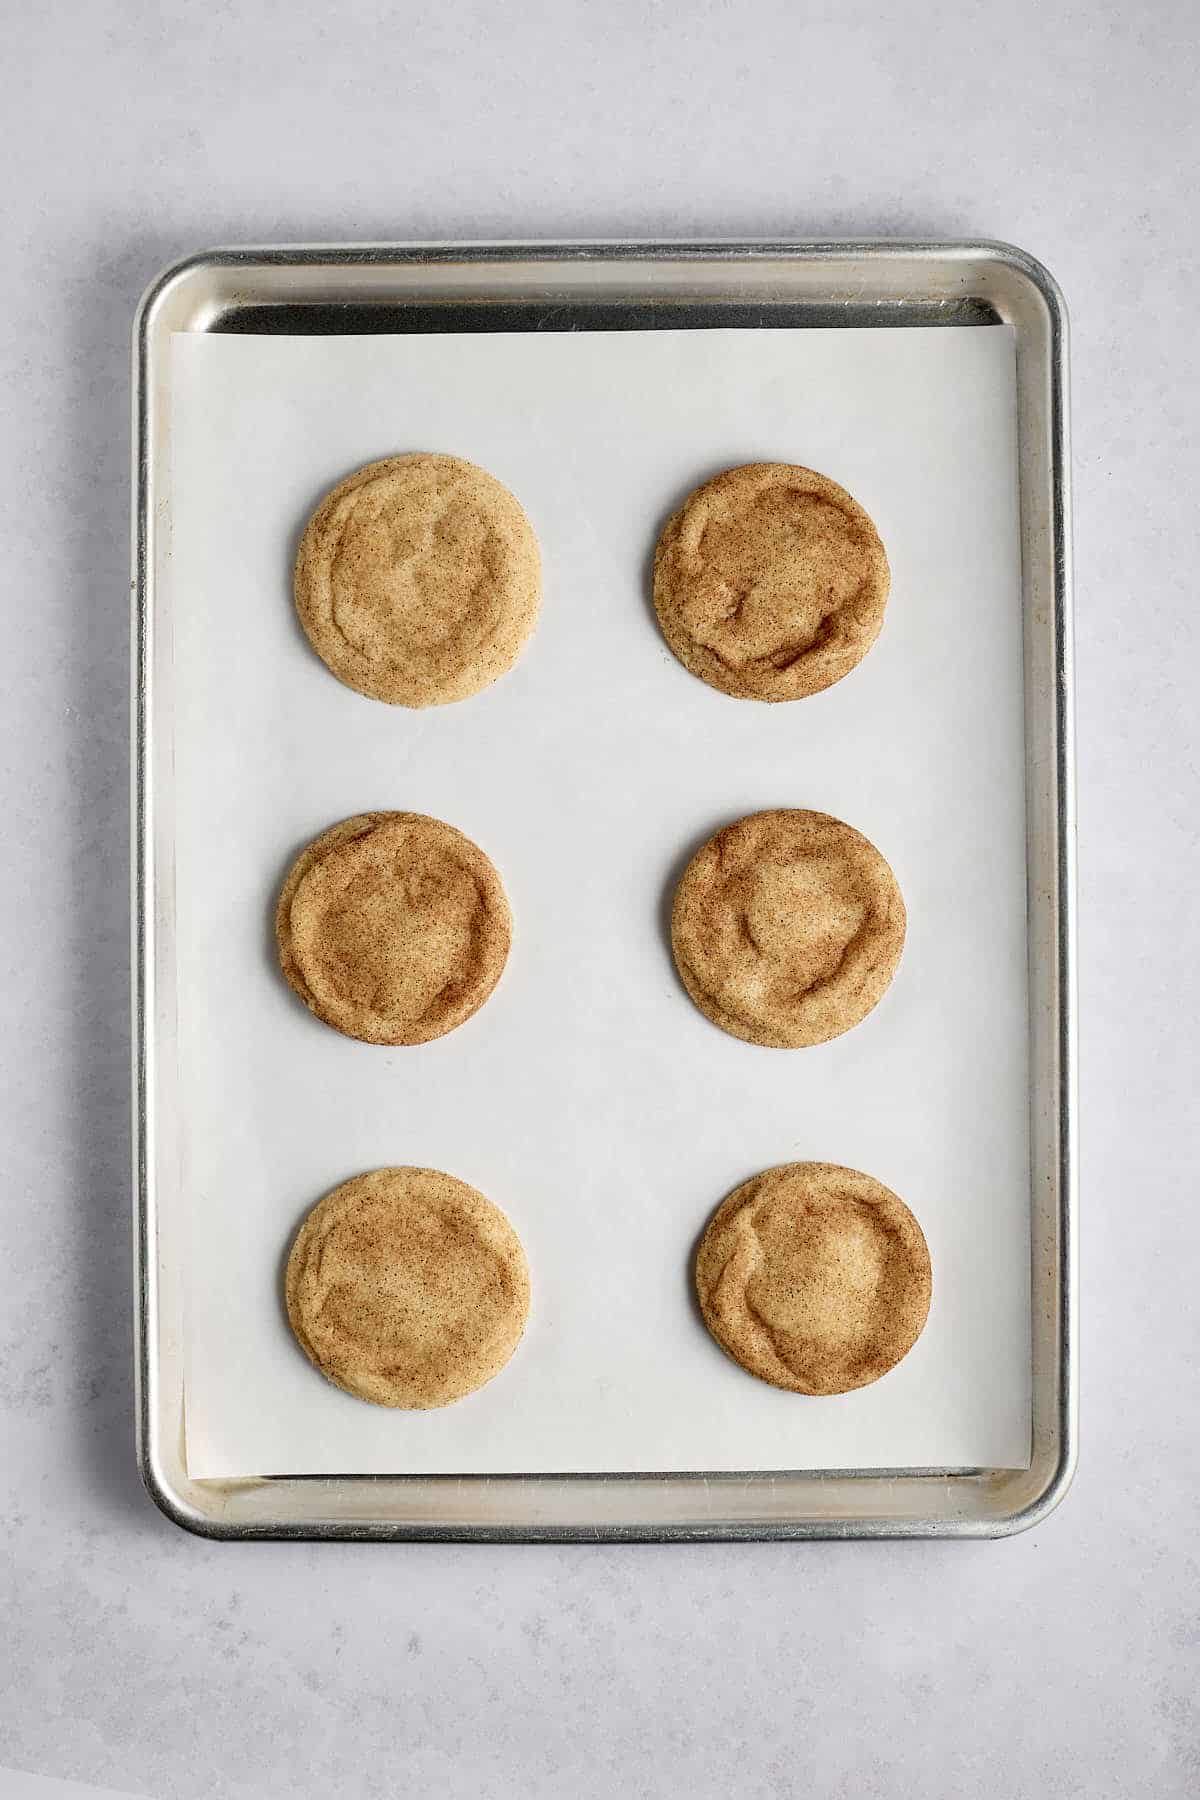
- REMOVE the baking sheet from the oven and turn the oven off. Cool the cookies for 1 minute.
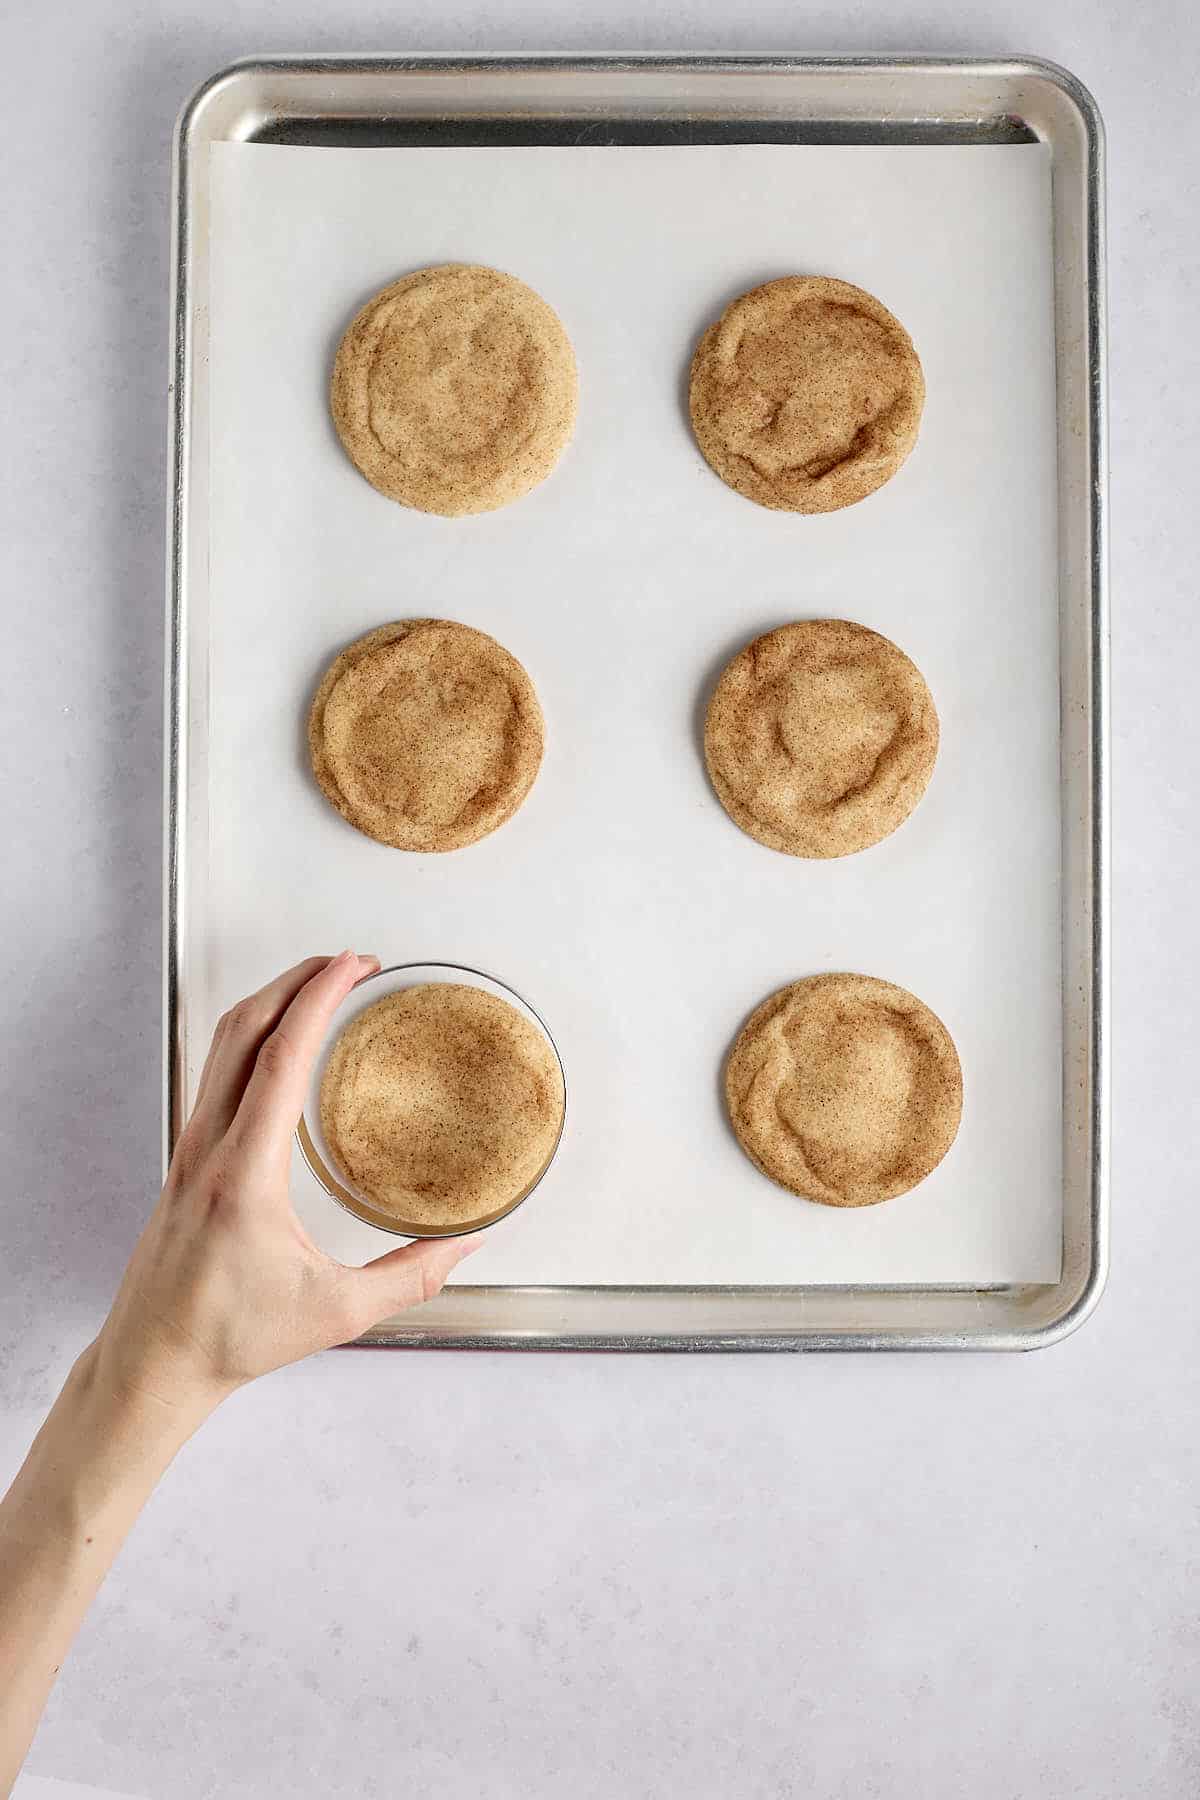
- SHAPE the cookies with a cookie ring. Circle the cookie with a cookie ring larger than the cookie.
Using a circular motion, swirl the cookie ring around the cookie. This will pull in the snickerdoodle sides, creating a round, uniform shape. Repeat with the remaining cookies.
- PLACE the cookie sheet on the cooling rack for 5 minutes.
- TRANSFER the cookies from the baking sheet to the cooling rack and allow them to cool completely, about 45 minutes to 1 hour.
- REST the cookies. Stack the cooled cookies 4 or 5 high and wrap them in plastic wrap. Place the cookie stacks in an airtight container for at least 1 hour, but 2 to 3 hours is ideal.
(An even better option is to freeze them overnight. See instructions below.)
- SERVE with hot chocolate or a tall glass of milk.
How to Store
Before storing the cookies, ensure they are completely cool. Otherwise, the warmth may cause condensation in the container. No one wants soggy cookies.
Store cooled cookies in an airtight container at room temperature. For extra moisture protection, wrap them in plastic wrap before storing them in the container.
Full disclosure: I don't use plastic wrap if everyone will be snacking on the cookies throughout the day and into the next.
How to Freeze
To freeze the baked cookies so you can pull out one at a time when the craving hits:
- Place the cookies on a lined cookie sheet.
- Freeze the cookies on the sheet for 1 hour.
- Transfer the frozen cookies to a freezer-safe container or freezer zip-top bag.
- Return the cookies to the freezer and freeze for up to 6 months.
When ready for a treat, pull out as many cookies as you want from the freezer. Remove the plastic wrap and thaw them in an airtight container on the counter for about an hour. Then gobble them down.
How Long Do Snickerdoodle Cookies Last?
Snickerdoodles will be fresh for 3 to 4 days if stored correctly in an airtight container. Keep in mind that if the container is frequently opened, the cookies can dry out quicker.
Snickerdoodles will last at least 6 months in the freezer if properly stored.
What to Serve with Snickerdoodles
- Quick hot chocolate made with chocolate chips
- A cold glass of milk.
Recipe
BEST Snickerdoodle Cookies (Thick & Fluffy)
Ingredients
- 3 cups + 1 tablespoon (396 grams) all-purpose flour
- 1½ teaspoons (7 grams) of cream of tartar
- ½ teaspoon (2 grams) of baking soda
- ½ teaspoon (3 grams) of table salt
- 1 cup (227 grams) of unsalted butter, slightly softened, about 65° Fahrenheit
- 1⅔ cups (330 grams) of white, granulated sugar
- 2 eggs cold, straight from the refrigerator
- 1 teaspoon (5 milliliters) of vanilla extract
- 3 tablespoons (38 grams) of white, granulated sugar
- 2 teaspoons (5 grams) of ground cinnamon
Instructions
- PREHEAT the oven to 400°F (225°C).
- SIFT several cups of flour back and forth between 2 large bowls 3 to 4 times.
- WEIGH 396 grams of the sifted flour on a digital kitchen scale and place it in a bowl. If you don't have a scale, use 3 cups + 1 tablespoon of sifted flour. (Measure carefully. Spoon the sifted flour into the measuring cup and scrape the cup flat with the straight edge of a knife.)
- WHISK the cream of tartar, baking soda, and salt into the flour.
- CREAM the butter and 1⅔ cups (330 grams) of sugar in a separate bowl with an electric mixer on high for 1½ to 3 minutes, or until the texture progresses from sandy to creamy. Please note: The butter should be between 62 to 65°F (16 to 20°C). Colder butter could prevent the cookie from spreading enough as it cooks. Warmer butter will cause the cookie to spread too much when baking and may create a more crispy cookie. If the butter gets too warm, refrigerate it for a few minutes before creaming it.
- BLEND the vanilla and eggs (one at a time) into the creamed sugar and mix on medium speed for 30 seconds. Please note: Take the eggs straight from the refrigerator before blending. They should be cold.
- MIX the flour mixture into the wet ingredients. Use an electric mixer on low and mix until the flour is incorporated. Scrape the sides of the mixing bowl with a rubber spatula and blend again.
- STIR the cinnamon with 3 tablespoons (38 grams) of sugar in a small, shallow bowl until well blended.
- SCOOP the cookie dough with a 2-tablespoon cookie scoop.
- ROLL the cookie dough ball in your palms until smooth. Then roll the ball in the cinnamon-sugar mixture until completely coated.
- PLACE the cookie dough ball on a heavy duty aluminum cookie sheet lined with parchment paper (or a silicone mat).
- REPEAT rolling the cookie dough balls and place them all on the baking sheet 2 to 3 inches apart.
- BAKE for 8 to 10 minutes until the edges are set, but the middle does not look completely solid. Use your judgment here. The cookie should not be doughy. Cook until the cookies look almost done.
- REMOVE the baking sheet from the oven and turn the oven off. Cool the cookies for 1 minute.
- SHAPE the cookies with a cookie ring. Circle the cookie with a cookie ring larger than the cookie. Using a circular motion, swirl the cookie ring around the cookie. This will pull in the snickerdoodle sides, creating a round, uniform shape. Repeat with the remaining cookies.
- PLACE the cookie sheet on the cooling rack for 5 minutes.
- TRANSFER the cookies from the baking sheet to the cooling rack and allow them to cool completely, about 45 minutes to 1 hour.
- REST the cookies. Place the cooled cookies in an airtight container for a minimum of 1 hour, but 2 to 3 hours is better. (A better option is to freeze them overnight. See instructions below.)
- SERVE with hot chocolate or a glass of cold milk.
Freeze Cookies
- COOL the cookies completely.
- STACK the cookies 3 or 4 cookies high.
- DOUBLE WRAP the stacked cookies with plastic wrap, ensuring that the cookie is completely covered.
- PLACE the wrapped cookies in an airtight container.
- FREEZE the cookies at least 24 hours. But a few days is fine.
Thaw Cookies
- REMOVE the cookies from the freezer several hours before eating them.
- BRING the cookies to room temperature.
- UNWRAP the cookies and place on a serving plate.
- EAT AND ENJOY!
Notes
- Weighing ingredients instead of measuring by volume will give you the best results in this recipe and all baking recipes. I like the Oxo kitchen scale, but any accurate scale will work.
- Make sure your oven temperature is accurate by testing it with an oven thermometer.
- Using cold eggs, straight from the fridge keeps the batter cool and prevents the dough from spreading too much while baking. The end result is thick cookies.
- If you use a smaller cookie scoop, reduce the bake time by about 2 minutes. Keep a close eye on them while they bake.
- Resting the cookies after baking them is optional. However, they taste amazing and have an incredible soft, chewy texture when you rest them before eating them.
Nutrition
Did you like this post? Then let's be social. FOLLOW ME on INSTAGRAM and PINTEREST to keep up with the latest happenings.


Renae
Can I freeze the unused dough (not rolled in cinnamon sugar)? Thanks!
Tami Mack @ The Tasty Tip
Absolutely! The dough freezes perfectly. Freeze it in dough balls for easy baking later.